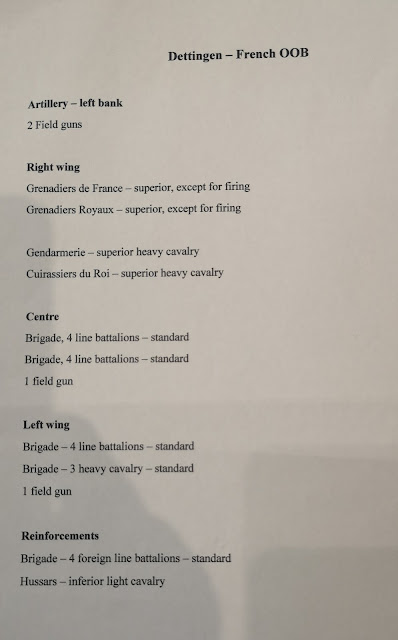
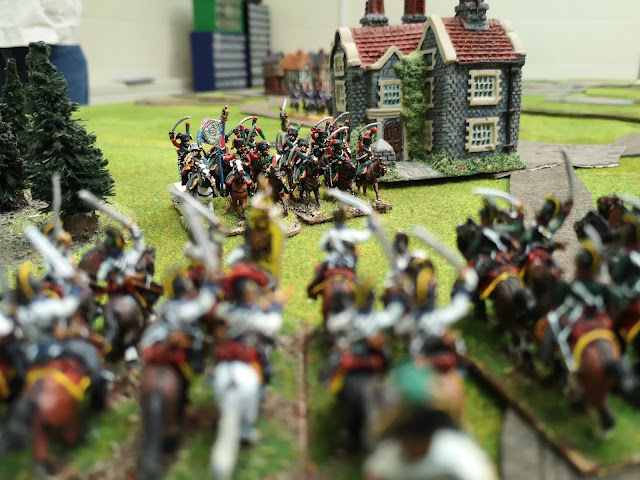
Back on the 12th and 13th of July we had a Friday night and all day Saturday game where we fought a fictional Napoleonic Peninsular War battle based on the ancient Battle of Cynscephalae in 197 BC. We used the Shako II ruleset to reacquaint people with it prior to a Leipzig game planned for October.
It was a great excuse to get my whole Anglo Portuguese army out on the table, minus some artillery and a couple of British line battalions that got swapped out for highlanders.
 |
| All my figures except for the Highlanders and Spanish Cuirssiers. |
The game started with a scouting phase where both army commanders sent out light cavalry units to locate the objective, a plateau hidden in the morning mists. These cavalry units soon engaged each other with honours split. Spanish hussars were seen off by French Chasseurs a Cheval while the Kings German Legion, (KGL) 1st Hussars saw off some Polish lancers, the first victory in what was to be a stunning battle for the German horsemen. Unfortunately after both sides scouts reported back the French reacted fastest and secured the plateau, leaving the Anglo Portuguese and Spanish the task of displacing them.
I had control of the right flank of the Anglo Portuguese with a British division tasked with assaulting the end of the plateau and if possible turning the French flank. To my left was a British and Portuguese Division who were to engage the centre of the plateau to try and prevent the french players from reinforcing their flanks. This division was to deploy after the flanks had started their assaults. On the far left was a combined Spanish and KGL division supported by the allied cavalry division. They deployed first and were to assault the left corner and flank of the plateau.
 |
| Spanish and KGL deploy. |
 |
| Allied Cavalry arrive to the right of the Spanish/KGL. Wellington and Beresford look on. |
 |
| Allied cavalry and the plateau ahead. |
 |
| Cavalry sweep across the enemy front. |
 |
| Charge! |
The Spanish and KGL advanced cautiously as a large French cavalry force was deployed to their front. To try and counter this the allied cavalry division swept across the front of the French position to engage the enemy where their infantry and cavalry commands met.
After some initial success against some horse artillery and a French battalion caught in line, the allied cavalry division was thrown back and dispersed by the jubilant French and Polish horsemen. This left the cavalry attached to the Spanish/KGL division as the only allied horse remaining. The Polish lancers buoyed by this victory charged into the advancing Spanish only to be thrown back with heavy casualties.
While this was happening I was slowly advancing my division towards the right of the plateau. To try and speed thing up I advanced in column, forgetting two vital aspects of the Shako rules. Firstly that once within the frontal zone of control of the enemy you can't change formation, so I would have to assault in column and secondly and of more importance, that the British do not get the benefit of flank support if in columns!
 |
| Highlanders to the front, advancing in column. |
 |
| Anglo Portuguese division begins to deploy in the centre. |
 |
| Onwards! |
 |
| Bugger, can't chance formation or claim support, bugger! |
Unsurprisingly attacking uphill in column against line and artillery without supports didn't go to well and my initial assault was repulsed with heavy losses. It was now time to redress my formation and shake out into line.
The centre division learnt from my mistake and changed into line before reaching the enemies' control zone. But still their advance also suffered from first french artillery and then musketry.
That was pretty much it for the Friday night and we reconvened Saturday morning to continue.
Back on the allied left the french cavalry routed two Spanish battalions but were soon to be met by the 1st KGL Hussars at the start of an epic action. Crashing into French Dragoons the hussars soon routed them followed by the weakened Polish lancers who tried to halt them. The Germans with Spanish Hussars tentatively in support wheeled and charged up the hill into the French infantry. The first battalion only managed to form a hasty square and were cut down by the rampaging German cavalry, the survivors ran to and disrupted a nearby square that was already weakened by artillery fire, and this soon followed the first as the KGL sensed further easy pickings. Now heavily fatigued the Hussars tried to extricate themselves across the forward slope of the plateau only to come under fire from another French battalion. To the French players astonishment the Hussars wheeled and crashed into this battalion before it could form square and cut it to pieces too before riding off down the slope past the advancing KGL line battalions.
A great example of what can be done with cavalry if used correctly against weakened or disordered troops and with fortuitous dice rolls of course.
 |
| Centre and right assaults shaping up. |
 |
| A look along the plataeu. |
Back in the centre the Portuguese lead elements fought their way up the slope against sustained artillery and musket fire from the french defenders, suffering heavy casualties as they bravely continued to prevent the French players from moving units away to support the flanks. The attrition eventually told and the Portuguese battalions either broke or were destroyed.
 |
| The centre continues on despite the Portuguese being routed. |
The following British battalions continued the assault but they too soon went the same way as their Portuguese comrades but the centre had done it's job. They had tied up the centre of the French forces, preventing them reinforcing their flanks until it was too late, and even then those forces that could redeploy were weakened from the hard fighting they had endured.
 |
| The assaults finally beginning to tell. |
 |
| Fresh troops getting stuck in. |
Back on the right having reformed my forces correctly the assaults resumed. I pushed my rifles and skirmished out on my far right and eventually managed to get them in behind the plateau. Bringing forward fresh troops and now being able to claim support my attack finally began to tell, forcing the French back up the slopes to the crest of the Plateau.
Some last ditch counter attacks by the French were eventually held at bay before a sort of stalemate on the right was reached with the remaining French left flank hemmed in on the end of the ridge.
 |
| The end is nigh on the right flank. |
The KGL infantry by this time were rolling up the remaims of the French right flank with many units finally routing after a hard fought struggle. The game was called with the French just about still clinging to the plateau but all but surrounded. It had been a bloody victory for the Anglo Portuguese and Spanish forces.
 |
| Final French troops surrounded but not defeated. |
Another great game and good refresher of the rules, with several talking points about certain rules discussed. Also it was fun to get all my British and Portuguese figures on the table at once again.
Thanks for reading and as usual for a fuller AAR and a lot more photographs see the club's Facebook album
here.
Tony.


