Thursday 1 October 2020

Black Powder gaming aids.

 As you may have guessed if you read my blog the main set of rules I use for my Napoleonic wargaming is Black Powder by Warlord Games. 

The rule book and supplements  have very nicely laid out stat sheets for the various troop types of the competing armies listing their attributes as well as any special rules applicable to them, which you can then hunt through the book to find.

I decided very early on, when planning my first scenario, that it might be useful to have copies of the stat sheets and the special rules collated, to help the players understand and control their forces easier.

To this end I produced my own copies of the stat sheets from the rule book and Albion Triumphant supplements for the Peninsular War armies from France, Spain and  Anglo/Portuguese.

National Stat sheets, examples.

I also collated the special rules associated with each army and produced sheets for these too.

National Special rules, examples.

Another useful tool from the rule book is the game play Quick Reference Sheet (QRS).

QRS example.

Warlord Games also provide a downloadable copy of this.

In the past I also found online copies of the QRS for the first edition of the rules that had been amended for play using 1/2 and 2/3 distances. For the second edition I could not find these so created my own.

Why has this post come about? Well on one of the Facebook groups dedicated to this period of warfare somebody posted that they were thinking of producing sheets for the A Clash of Eagles supplement and was asking if anybody had already done this or something similar?

This reminded me that although I had produced these myself I hadn't made them available to the wider community via the downloads section of my blog, hence this post was born.

So all three army stat sheets and special rules sheets as well as Second edition QRS at 1/2 and 2/3 distances can be found in the My Resources / Downloads list in the right hand sidebar.


Update:

I also found online some stats for 1809 Austrians which I have just managed to relocate. So if you are interested you can find them Here

Tony.


Monday 21 September 2020

M*A*S*H Evac, Game at NBHW

Last Friday saw five of us gather at New Buckenham to play a new period and new ruleset, to the club anyway. The game was set in the Korean War and used Warlord Games Bolt Action rules.

All the figures were supplied by the game's umpire, his lock down project, in what was to be a rule learning night for all of us.

The scenario saw a US Mobile Army Surgical Hospital (M*A*S*H) unit threatened by advancing Korean Peoples' Army (KPA) and Chinese People's Volunteer Army (PVA) troops with only two squads of USMC to protect them while they tried to evacuate their patients and staff.

Yes that M*A*S*H unit.

The two marine squads were dug in along a hill crest with a bazooka team in support and would have to hold off the communist hordes for ten turns to enable a full evacuation of the patients, by helicopter, and staff by road convoy.

Table from the US side.

It didn't take us too long to pick up the general gist of the rules, the biggest slow down was checking who had what weapon when firing to get the ranges and modifiers correct.

The massed KPA and PVA troops were soon advancing towards the dug in marines with only the slightest encouragement required from their political officers' pistols. The communist fire was eerily accurate inflicting casualties and pins on the US forces almost at will. In contrast my squad on the US left seemed unable to hit the broadside of a barn door, no matter how much lead I slung at them.

The Chinese infantry were soon joined by an old captured Japanese Ha-Go tank, which started to add HE shells into the mix of fire hitting my squad.

Oncoming communist hordes.

Our bazooka team failed in their one attempt to take the tank out before they in turn became casualties themselves. The one bit of success the USMC did enjoy was the right hand squad taking out the PVA medium machine gun. With the PVA and KPA seemingly concentrating on my squad and the centre command team, the left squad started to shift to their left in support.

KPA nearest, PVA further away.

Political officer taking names during the assault.

Officer and standard bearer showing the correct level of zeal.

It all proved too little too late, my poor dice throwing all night saw my much reduced squad finally rout while a Chinese officer and bugler finally saw off the USMC 2nd Lt in hand to hand combat. The second marine squad was also now taking casualties as the Chinese troops shifted their attention to them.

The final assault that saw my remaining three marines rout.

The umpire called the game at this point. The outnumbered USMC had held on long enough for fourteen of the twenty casualties to be evacuated along with many of the hospital staff, for those left POW camps loomed.

A great first outing for Peter's latest collection as well as an introduction to the Bolt Action rules.


More pictures as usual in the club's Facebook Album

Tony.

Thursday 20 August 2020

AWI Game at NBHW

So my second Friday back at the club, now with added face masks, saw a 28mm AWI game with a scenario cobbled together from a few sources.

The rebellious american forces had located a Hessian encampment and decided to attack with the element of surprise afforded by the foggy conditions with the aim to do as much damage as possible before reinforcements from a nearby British encampment could be brought to bear.

Looking through the Hessian encampment towards the crossroads. 

The officers returning to camp after a night in the local "establishment".

A Hessian jaeger picket at the crossroads would detect the advancing Americans on a successful dice roll and fire off a warning shot to alert the camp, failing that a shot would be fired as they were overrun.
Once alerted the German battalions could start to form up within the tent lines, taking two turns to go from disorganised to unformed to formed. The jaegers to the right of the road started from unformed due to their elite status. My artillery started and remained unlimbered and would not be visible to the Americans until they got closer.

My picket seemed to be suffering from an excess of sauerkraut and the rebels got in two turns of movement before they were spotted and a warning shot was fired to alert the camp.
My large line battalions roused from their tents and hastily fell in towards the edge of the camp nearest the village. The jaeger, being of higher quality, started to form a skirmish screen to the right of the camp. Unseen by the Americans my artillery started to manhandle their guns into position.
A messenger was also dispatched to the British camp in case the warning shots had been muffled by the fog.
Taking advantage of their surprise appearance the colonials rapidly advanced to the edge of the camp, deploying their artillery at the crossroads, and started to poor fire into the reforming Hessian units, the centre unit of fusiliers suffering particularly from these guns.
My jaegers' accurate rifle fire soon started to take a toll on the approaching opposing rifles as did my artillery when in opened up on this flank.
Once fully formed my line battalions began trading musketry with the enemy and it was at this point that the British reinforcements began to arrive to my rear.

Musketry fire through the camp as the British start to arrive.

The american artillery was beginning to inflict serious casualties on my fusilier battalion, but they shook this off passing all morale tests. The jaeger were coming under increased pressure from greater number of assailants and so refused their left flank for a more defensible position, however together with the artillery they did force the opposing rifles to retreat.
With British troops now streaming up the roads to their rear the German line battalions decided enough was enough and so marched off, bayonets glistening in the weak early morning sunshine, towards the enemy to their front, trampling tents before them as they went.

More British arrive as the jaegers pull back to a more defensive position.

View from the mule train.

They advanced in splendid formation, preparing to charge the upstart militia and colonials. However at this point I goofed. Overestimating the distances I only charged in one battalion, believing in error that the other was out of range, a fatal mistake as it turned out.

Hessians advance through the tent lines.

Charge!

In with the bayonet.

Now came the time for the dice gods to desert me. A large battalion of trained German regulars vs militia and colonials should have been relatively easy but fighting disordered due to moving through the tents and some very poor dice rolls from me as opposed to the exceedingly good rolls from my opponent saw my battalion falling back in rout. As my other battalion was not in melee, due to my distance estimating error, they had to take a morale test for a friendly unit routing, and yes, promptly failed it too. The jaegers seeing this also rolled and got a retreat result, so not as bad.

View from the rebel artillery.

Last ditch action.

With the Hessians either in rout or retreat and the British beginning to form up in strength, the Americans decided their work was done and prepared to withdraw. As time was also getting on the game was called at this point as a win for the upstart colonials.

Another great AWI game at the club, just need to sort out better dice next time!

Tony.

Tuesday 18 August 2020

Peninsular encounter. Back to gaming at NBHW.

So two Fridays ago, for the first time since March, it was back to NBHW for face to face wargaming.

Obviously new rules and regulations were in place due to Corvid19, those imposed by the village hall we play at and those we have self imposed. Our games are now limited to four players plus an umpire max and dice and tape measures are not shared. Also we are limiting those who set up and pack away the games as well as leaving our miniatures boxed after games for at least 72 hrs. So with all this in place it was back to gaming.

The game was a Peninsular War encounter scenario between French and Spanish forces. It was set up using the points system from the Albion Triumphant One supplement to Black Powder and played using the 2nd Edition of these rules. Each force was 600 points and by god were we rusty with remembering the rules, even having to look up some of the really basic stuff.

The battle field from the Spanish end.

There were four objectives worth victory points, the crossroads just outside the near village, the centre farm, the far village and the wooded area to the right.
The French deployed all their forces on their right flank, one large infantry brigade with attached foot battery and one large cavalry brigade.
I had command of two brigades of Spanish infantry with a mixture of line and militia battalions and a half battery of artillery each. These were positioned with one brigade defending the near village and the second on the road to advance on the farm. My co commander had a cavalry brigade, which he split with the heavy component positioned on our left flank facing the only open country on the board, while the hussars went on our far right. His other command was a large militia brigade plus half battery which formed to the right of the near village.
Even with upgrades removing the "wavering" special stat from the Spanish units this still left everyone except the militia as "unreliable" meaning they would need to role less than the commander's SR to execute an order, so six or less on two D6 then, what could go wrong!

Militia to the right and my brigades in the village.

The French invaders move off.

To nobody's surprise it was incredibly difficult getting the Spanish to move and the French stole a march and occupied the centre farm before my assault brigade had even got halfway there. Things didn't go much better for the cavalry, of either side, with only the Polish lancers moving anywhere.

Unsurprisingly the French reached the farm first.

Using the new re-role method for C-in-C's  finally got the Spanish heavy cavalry moving, a blunder, making then charge three moves forward straight into the clutches of the Polish lancers who in a series of charges and follow through moves, plus much better dice rolls than us Spanish players could muster, soon broke the Spanish cavalry brigade. This meant the only moves our hussars made on the right flank were backwards.

In the centre I finally got my "Irish" battalions forward and into line, just in time for the forward battalion to get shaken due to some very accurate fire from the defending French. Never mind, these pulled back through the supporting battalion which then charged the farm walls. After two rounds of melee though they to pulled back, shaken. so another broken brigade, two out of three battalions shaken.

Spanish "Irish" prepare to try and attack.

The assault going in.

To the right the militia finally got going too, as militia they weren't "unreliable". They were soon pushing on through the woods in the hopes of catching the French unawares and maybe reaching the far village, if not just capturing the wooded area. Unfortunately the leftmost battalions were caught in enfilade by French units in the farmyard and took casualties while the reduced movement through the woods gave the French time to move more infantry across to the edge of the woods to meet them.

Militia advancing through the woods.

So with the left of the militia brigade taking fire as it moved through the woods the right pressed on across the open ground, only to be met by the rest of the French cavalry, who also finally passed a command role or two, with the inevitable result (we may have got some rules wrong at this point). So a third Spanish brigade broken out of four, game over and a French win.

What did we learn from this game? Well we really need to go back and brush up on the rules again and also how hard it is to get anything done when you need a roll of six or less on two D6!

It was great to get back to gaming again though and nice to see all the figures my colleague had completed during lock down get a run out.

As usual many more photographs in the clubs Facebook Album.

Tony.


Wednesday 10 June 2020

15mm Buildings

Whilst perusing the web and eBay for some other MDF items, I came across J B Wargamming Scenery. He had the MDF items I was after, a dice tower and box storage for gaming cards, but also lots of fairly inexpensive buildings in a variety of sizes. Having recently acquired some 15/18mm Napoleonics,  post here, I decided to take a punt on some 15mm buildings for them so I purchased his 15mm Walled Farm A, Premium.


After I received the item a quick dry fit revealed that some trimming would be necessary due to some inaccuracy in manufacture, nothing major. I was also missing one gable end for the smallest building, but had an extra wall, so I cut a gable end from this piece.
The pieces are also only detailed on one side. I have no problem with this for the buildings, as even though the roofs and upper stories are removable, it is unlikely I will be placing figures inside at this scale. However it seems strange not having the detail for the inside of the main compound gate represented, I suppose at this price point not unreasonable though. I chose to paint this in later, in hindsight I wish I had scored the detail into the piece as well.

The extra wall and one gable end I received.

Assembly completed, with figures for scale.

For painting I used a sandy coloured craft paint mixed with dried play sand on all the wall surfaces with Vallejo Basalt Grey 869 on the exposed stone work.
The roofs were painted with Vallejo Orange Brown 981 with a drybrush of Green Grey 886.
The cobble/slab yard was base coated with Vallejo Basalt Grey 869 then covered with European Thick Mud weathering effects 807 before getting a light drybrushing with Humbrol 63 Sand.

Walls and roofs done.

The woodwork I painted Vallejo Beige Brown 875 with Woodgrain 828 over the top on the doors.
Outside the walls the base was painted with Vallejo Medium Olive 850 before being flocked.
Finally I added some door hinges and knobs with Vallejo Plastic putty before painting with Gunmetal Grey 863.
Using a very watered down Vallejo Medium Olive 850 I then added some staining to the exposed stonework, around the wall bases and window sills.

Finished model.

The two large buildings are interchangeable.

Overall apart from a bit of rework required a great little wargaming terrain piece at a very reasonable price.

Tony.

Wednesday 20 May 2020

And now for something completely different! Part 2

Having completed the two warbands for Vanguard, post here , I purchased some MDF terrain by Warcradle Scenics from a local online store Coffee Cup Games.

So with warbands, buildings and rules it was time to play.


We started out with just the basic move, ranged attacks and melee attacks and added in the other rules as we became more confident. It didn't take long for my son to get to grips with the basic roll to hit, saving roll and wound mechanics and I had difficulty beating him in these first games.


As we progressed and added in some additional rules and pointed warbands I started to finally get my own back, mainly due to better understanding of tactical play, fortunately he could still remind me when I got the basics wrong, Doh!.


Having mastered the basic principles my son decided to create his own wargames based on these and soon created stat cards for Lego minifigs for battles on the carpet. After a recent resurgence in interest in Star Wars he also adapted the basic Vanguard mechanics to use with his diecast star ships.


This latest bit of adaptation on his part has led me to purchase the Star Wars X-Wing (2nd edition) miniatures game from Fantasy Flight Games


We'll see how that goes.

Tony.

Monday 27 April 2020

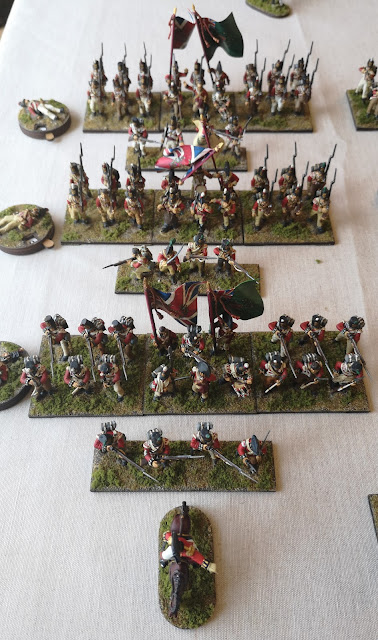
My Napoleonic Anglo/Portuguese army, as it currently stands.

So after I completed my Portuguese brigade for my Peninsular forces last week, post here, I decided to get all the completed units out for review and this post is the result.

Force out for review.

As a trial I recorded a shortish video to see how it would turn out.


A bit more of a breakdown. The first formations are based on the Order of Battle for Talavera 1809

3rd Division, 1st Brigade.

3rd Division, 1st Brigade: Major General MacKenzie

2/24th Warwickshire Regiment of Foot
2/31st Huntingdonshire Regiment of Foot
1/45th Nottinghamshire Regiment of Foot

3rd Division, 2nd Brigade

3rd Division, 2nd Brigade: Colonel Donkin

5/60th Royal American Rifles Regiment of Foot, five companies
2/87th Prince of Wales Own Irish Regiment of Foot
1/88th Connaught Rangers Regiment of Foot

4th Division, 1st Brigade

4th Division, 1st Brigade: Brigadier General Campbell

5/60th Royal American Rifles Regiment of Foot, one company
2/7th The Royal Fusiliers Regiment of Foot
2/53rd Shropshire Regiment of Foot

4th Division, 2nd Brigade

4th Division, 2nd Brigade: Colonel Kemmis

5/60th Royal American Rifles Regiment of Foot, one company
1/40th 2nd Somersetshire Regiment of Foot
97th Queen's Own Germans Regiment of Foot
2nd Battalion of Detachments

Heavy Cavalry Brigade

Fane's Heavy cavalry brigade

3rd Prince of Wales's Dragoon Guards
4th Queen's Own Dragoons

Light Cavalry Brigade

Cotton's Light cavalry brigade

14th Duchess of York's Own Light Dragoons
16th Light Dragoons

Artillery

There were three batteries of Royal Artillery at Talavera and we try and use two bases per battery when playing Black Powder. So that gives one extra base and a Horse Artillery base for other scenarios.

The rest are additional units to add a bit of variety for other gaming scenarios.

Engineers

Engineering cart and Officer plus some engineers kitbashed from Victrix infantry

KGL Light infantry

2nd KGL Light Battalion, acquired as surplus from another club member and rebased. Spare officer and a bit of fun, british soldier with captured French eagle.

Portuguese

At the front Major General Beresford and staff, off to the side a bit of religious support. Artillery to the left with a field telegraph unit. In the centre the Infantry.

Independent Portuguese Brigade: Colonel Pack

4th Estramadura Cacadores Battalion
1/1st & 2/1st Lippe Line Infantry Regiment
1/16th & 2/16th Viera Telles Line Infantry Regiment

CinC
And finally of course Wellesley himself with a staff officer and escort from the 1st KGL Hussars.

As the video said still plenty more in the lead and plastic pile to do.

Tony.