Showing posts with label Tips. Show all posts

Monday, 13 June 2022

Next unit up, 23rd Light Dragoons.

The next unit I am working on is the British 23rd Light Dragoons for the Peninsular War. This is the last British/KGL cavalry unit needed to complete the for our Talavera games. The figures are once again from the excellent Perry plastic box set.

Talavera was to be the 23rd's only action in the Peninsular after it suffered heavy casualties when it charged the french but failed to see a steep ditch, into which many horses and men plunged. It shortly thereafter returned to England and didn't see action again until Waterloo. The KGL hussars brigaded with them were a little more cautious or lucky and avoided the worst of it.

So if I want to be accurate I will only be able to use this unit for one Battle, as the Tarleton helmeted uniform of Talavera could not be used for Waterloo. But no they will still be used as needed for pickup games etc.

Uniform of 23rd Light Dragoons.
From British Napoleonic Uniforms by C.E.Franklin
(I will be using the centre version)

One thing I have started to make more use of now is the airbrush and spray booth I purchased just before lock down in 2020. In the past I have used it for some black priming but have now found how much better Vallejo grey primer covers when airbrushed on rather than just brushed. A vast improvement. I also decided to apply the base coat for the horses with the airbrush and found that the Foundry horse tone colours covered much better using this method, especially the lighter tones.

Recently I purchased some crocodile clip grippers on sticks after seeing them used on YouTube and they make holding models when airbrushing much easier.

Spray booth set up with new crocodile clip gripper rack
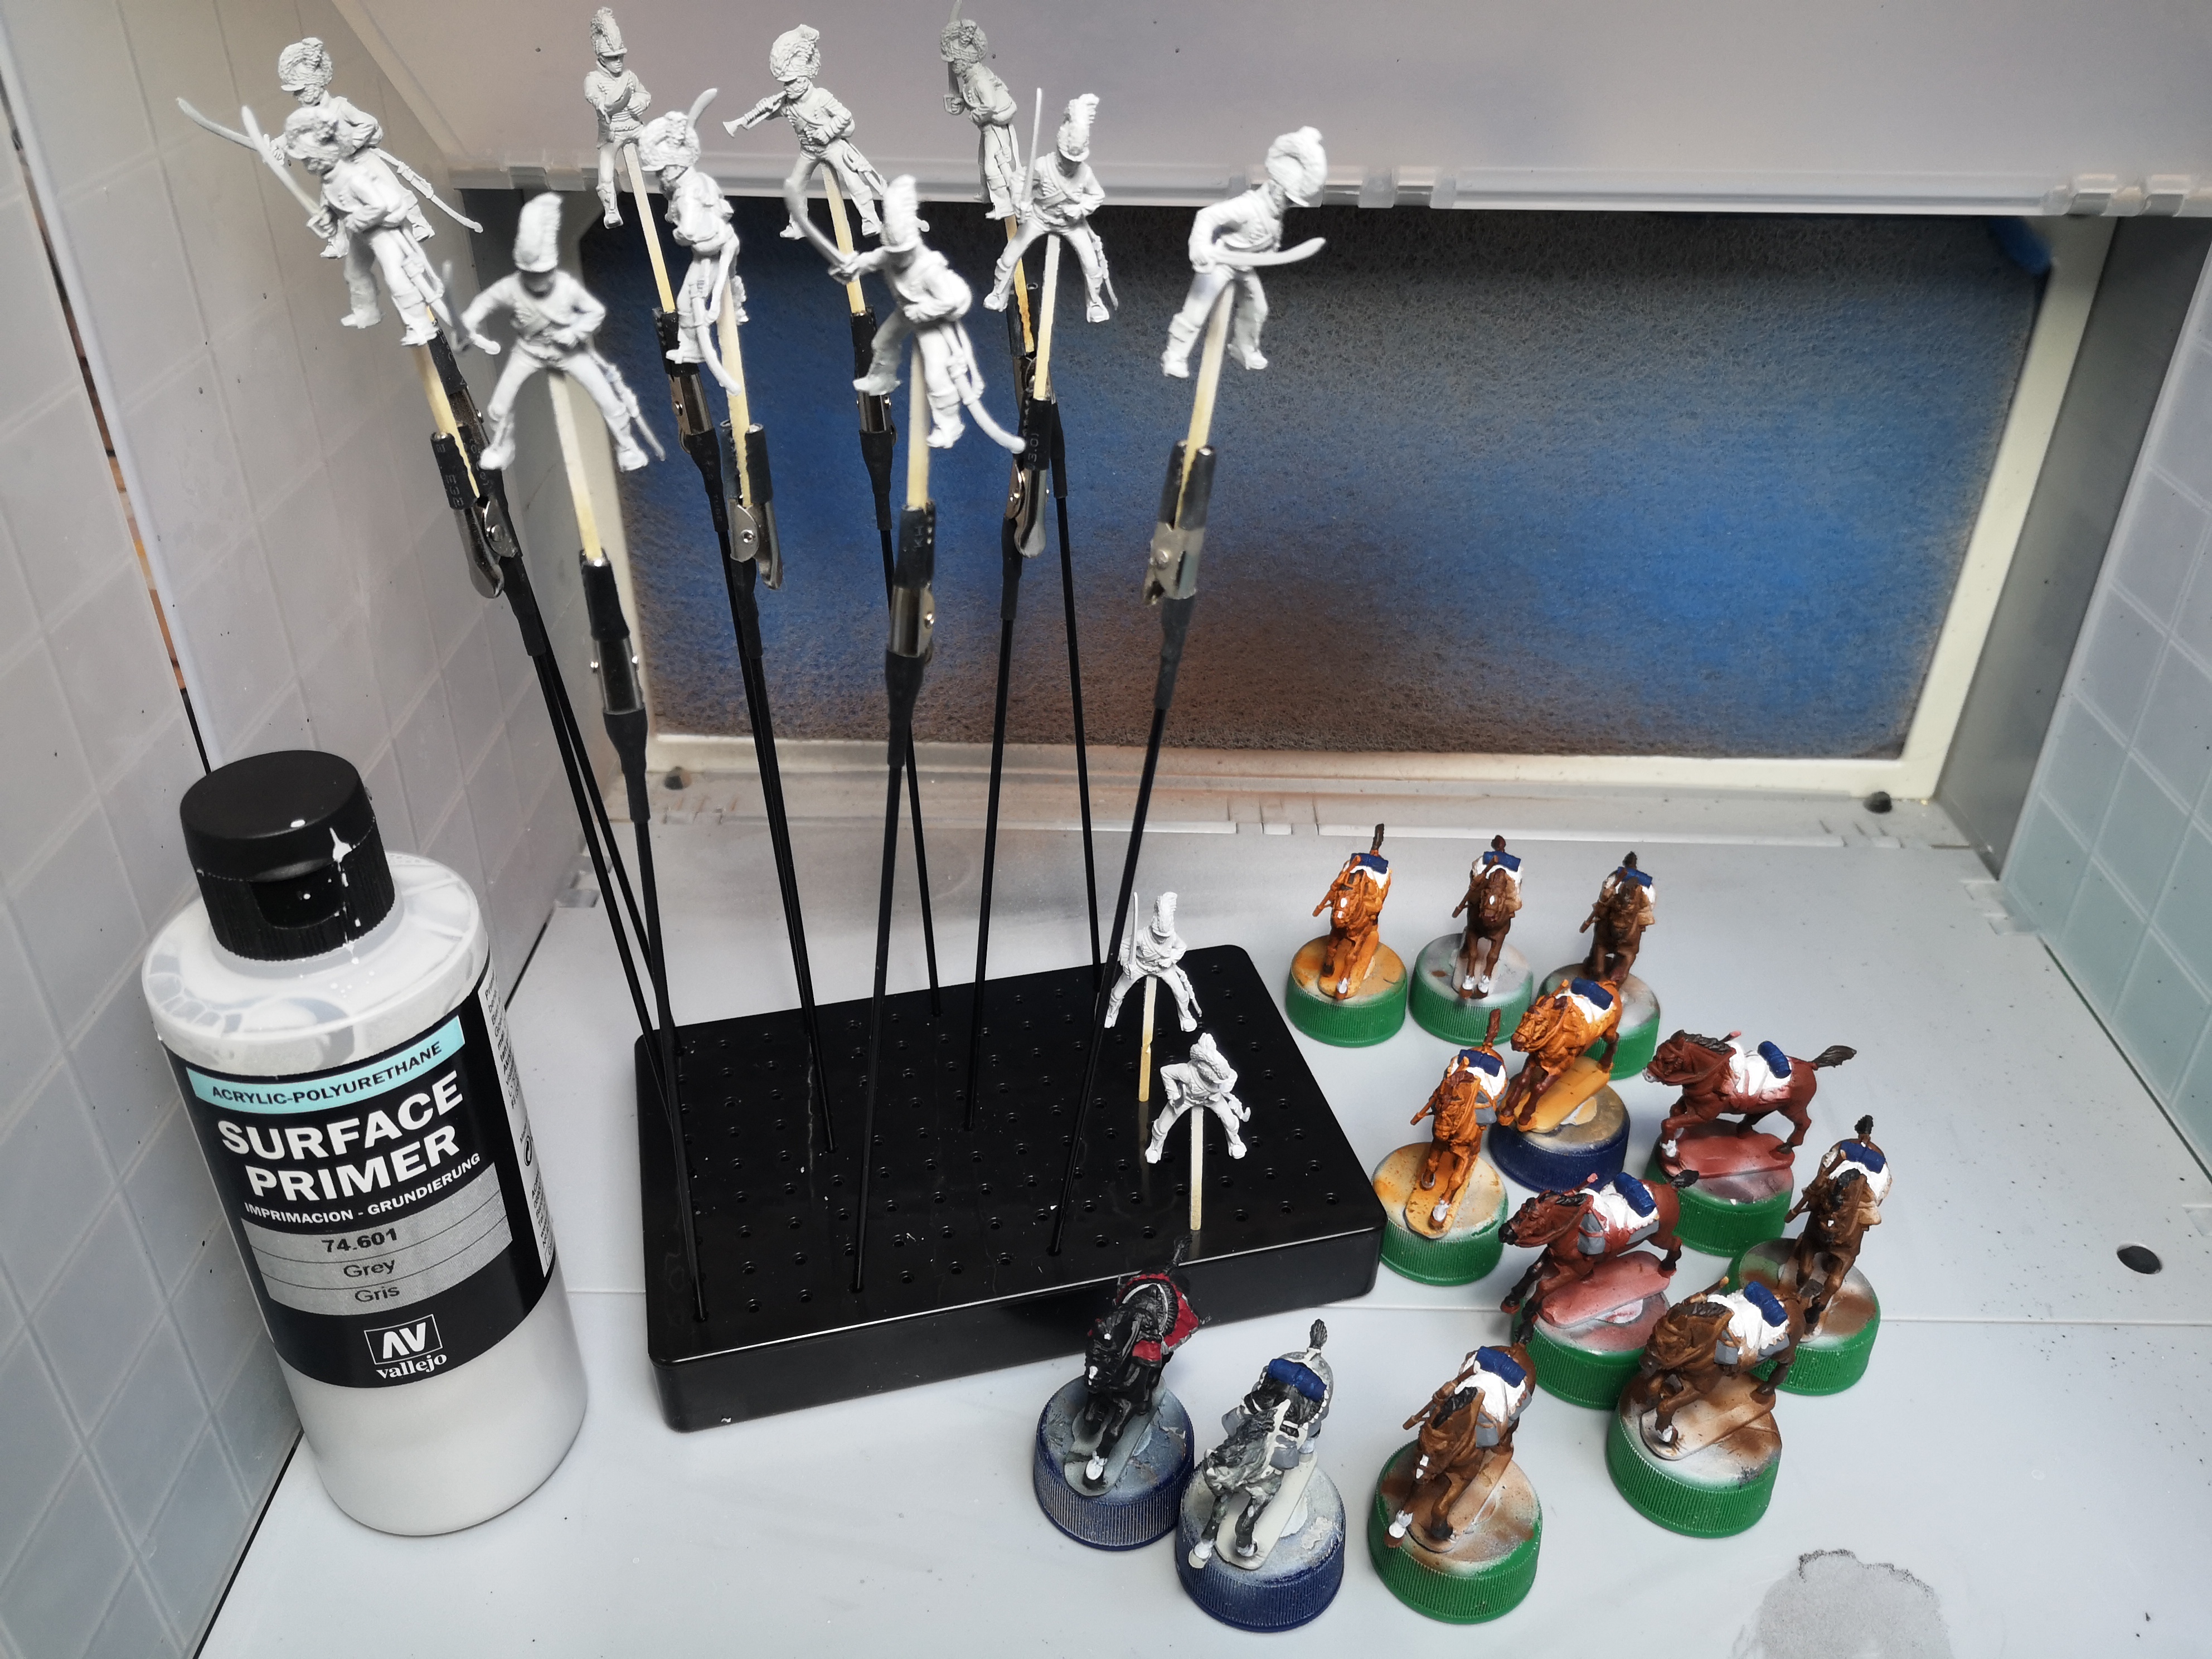
Closer view.


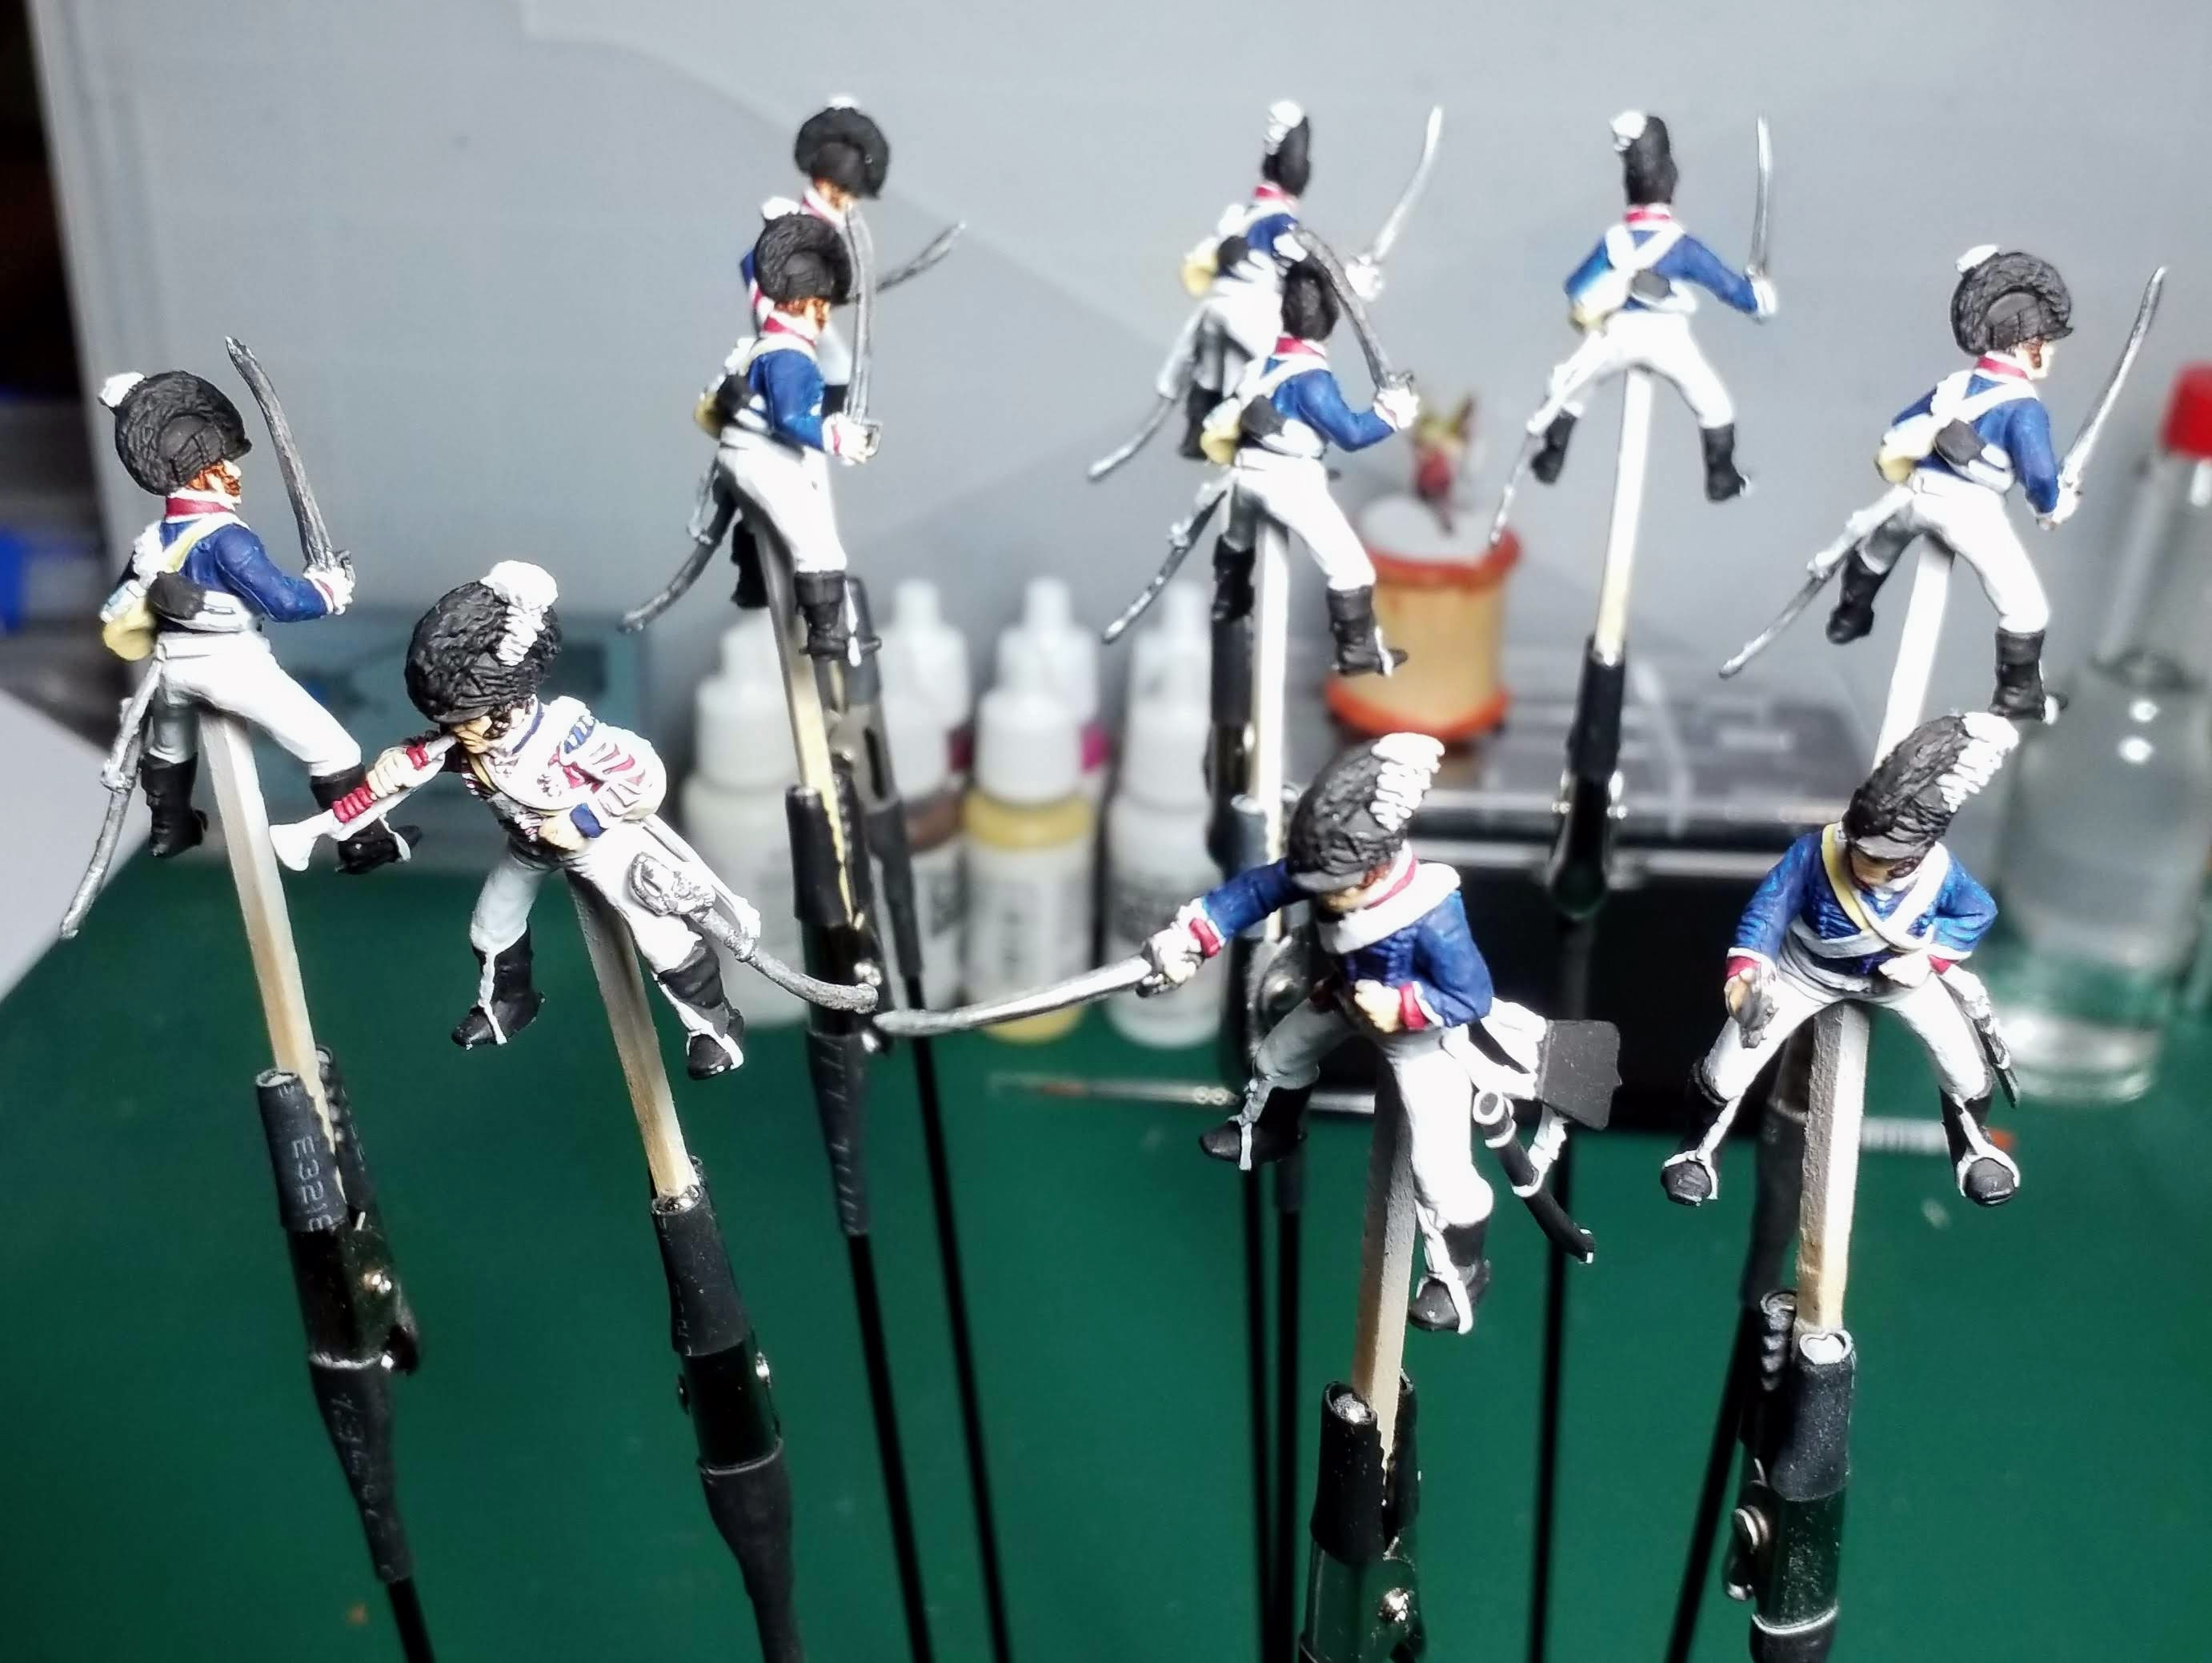
In progress work on the troopers.

I found having the figures on the clips made them easier to manipulate when painting.

Painting finished and fixed to horses.

Next up varnishing and basing.

With the painting finished, with the exception of the horses eyes which I paint in with gloss after applying the matt varnish, it's now time for varnishing then basing.

Varnished, on bases ready for texture.

Oh course I got carried away and stuck them down on their bases before painting the horses' eyes!

Having painted in the eyes it was then on with a layer of sand, paint over with a paint/pva mix to seal, two different dry brush layers then on with flock and done.

And finished. well base edges still need tiding up.

So that's another unit finished and with my friend's KGL Hussars the full complement of British cavalry for Talavera.

For paint colours I use see "My British Light Dragoon paint recipe" in the My Resources / Downloads sidebar.

Now what's next?

Tony.

Monday, 4 April 2022

Additional artillery.

Later this year I will again be helping to stage the Battle of Talavera at my gaming club. This will be the third time we have played this battle and the first time using Shako II as the ruleset.

Having researched the battle quite a bit I have known for some time that the British Royal Artillery battery "Lawson's Company", deployed in the Pajar Redoubt, was equipped with 3lb cannon. Previously unaware of a producer of these in 28mm normal 6lb models have been used.

Earlier this year in a random conversation at the club I became aware that not only were 3lb cannon available in 28mm but that another member had a spare and would I like it?

The model was by Trent Miniatures available through Skytrex

So the obvious answer was yes and an order was placed with the reopened Front Rank for some crew.

While this particular cannon was not the exact same pattern of 3lb that was thought to have been used it was still a 3lb british cannon of the period. All I needed to do now was paint it up.

Time became available when a dose of Covid gave me ten days off work, fortunately being fully vaccinated it was only a mild case.

The cannon model was very nice, only things I did extra was drill out the barrel and add chains.


This time I haven't glued the cannon in place so I can swap in a heavier gun if required for other games.

Tony.

Monday, 29 March 2021

Finally finished my dismounted light dragoons.

Ages ago, way before the first lockdown I decided I needed some dismounted light dragoons for my Anglo / Portuguese Peninsular army. Although the two main rulesets my army are used with (Black Powder and Shako II) don't make use of dismounted cavalry for the Napoleonic period, in one of my game scenerios we added in a house rule to allow french dragoons to dismount and act as skirmishers. We took advantage of other BP supplements' info and adapted.

As this scenerio has a British Light Dragoon picket I thought if I could find miniatures, why not. As it happened the Perry twins released some just around this time and so I purchased two packs of six from them. Brigade Games in the USA also released some dismounted British light dragoons as well, sculpted by Paul Hicks, their range included a horse holder set which I also purchased.

These were all duly based and primed ready for painting, the photo date stamp said June 2020.

Primed and ready, June 2020.

Base layer painting started a few day later.

Painting starts

This continued at a steady, if not slow pace until sometime around late August when my hobby mojo got up and left the building. No idea why, just developed a meh attitude to getting stuff out to paint of an evening after work. Whether this was just a symptom of the general meh that I'm sure a lot of people had last year, and may still be having, or just a shift in interest caused by no physical gaming occuring as the second lockdown started, I don't know.

Finally this February I had to go away for a week long training course for work and the prospect of every evening sat in a hotel room resulted in me getting these figures out again to take with me, along with a few painting supplies. To my surprise they were a lot nearer to completion than I remembered.

Returning after this week away they only needed final touchups and the basing finishing before varnishing. Another small delay while I ordered a base for the horse holders and then they were ready for varnishing. This finally happened two days ago as I wanted to try using my airbrush for this now I had a wider nozzel and needle.

Ready for varnishing.

Pre varnish.

After appling the matt varnish I painted in the horses eyes with gloss black and then re-varnished the horses' coats with a satin varnish, as the flat matt made them look lifeless.

Horse holders, post matt varnish, pre satin coat.

Skirmishing.

Full unit, 14th Light Dragoons.

I have painted these with orange facings to represent the 14th Light Dragoons, who I also have as a mounted unit.

So after almost nine months they are finally finished, the longest it has taken me to complete anything (once started). Paint colours used can be found in the blog sidebar in the "My Resorces/ Downloads" section.

The next project, 18mm ACW Union cavalry was primed and basecoating started this weekend too. Hopefully these won't take as long and we can get back to real gaimg soon.

Take care,
Tony.

Monday, 20 April 2020

Paint colours

In case anyone is interested I have started putting together "Recipe" cards for the paint colours I use when painting my forces. An example is this one for my British light Dragoons.


As I complete more, links to them will appear in the "My Resources / Downloads" section in the right hand side bar.

Friday, 31 January 2020

Artillery emplacement.

Over two years ago at a show I purchased some gabion sets from Renedra with the intention of producing some artillery emplacements for use with my Napoleonic figures. I wanted something a little more rough and ready than the earth work components we had used for the redoubt at Talavera, which I believe looked too well prepared.

Redoubt at last Talavera game.

I also bought some mdf bases from Warbases to mount them on. I wanted these to be modular for flexability of use so decided on three artillery positions, two angle pieces and two end return sections. I cut the mdf bases to size fixed the gabions in place, added some cut down dowel logs and off cuts of blue foam to bulk out the earthworks to the front of the gabions, added ballast for the filling and then forgot about them for two years.......as you do.

With a planned refight of Talavera in the calendar for later this year they were brought out for completion. First some filler was applied over the blue foam to complete the earthworks around the gabions.

Filler added

Three gun positions, two angles and two end returns.

Next everything was primed black.

All primed.

Before base coats were applied, some washes and drybrushing.

After painting

Close up.

I then added another layer of the ballast to the infill of the gabions and gun positions before putting a few lines of flock on here and there to try and suggest edges of cut turf and a couple of tufts at the edges of the disturbed ground.

Rear of whole emplacement.

From the front.

Artillery in place.

Some of the options available.

Overall I'm happy with how they have turned out and think they look more temporary as well as more recent in their construction. At some point they will need a coat of varnish but otherwise finished.

Tony.

Tuesday, 29 January 2019

British RHA and Portuguese Telegraph.


After constantly coming up with scenarios that would benefit in having a half battery of horse artillery attached to a light dragoon brigade, I thought it was time to get my own rather than keep borrowing a model off another club member. So when another member was placing an order with Perry Miniatures earlier in the year, I took the opportunity of tagging my order for a Royal Horse Artillery 6lber and the newly released Portuguese telegraph station onto his.

First up the Royal Horse Artillery 6lber Firing.

Primed and gun carriage base coated.

Lace and more lace

Gun completed, troopers just brass to go.

Troopers awaiting wash.

Paints used, Vallejo unless stated otherwise:
  • Grey Surface Primer (601), all except gun barrel.
  • Black Surface Primer (602), gun barrel.
  • Dark Prussian Blue (899), jackets.
  • Vermillion (909), facings, trouser stripe.
  • Basalt Grey (869), trousers.
  • Leather Brown (871), trouser reinforcement.
  • Off White (820), sword shoulder belt, helmet plume
  • Black (950), boots, helmet, sword grips.
  • Oily Steel (865), scabbards.
  • Gunmetal Grey (863), buttons, sword hilts, buckles, end of rammer.
  • Flat Flesh (955), flesh.
  • Ivory (918), sponge.
  • Brass (801), helmet trim, chin scales, gun barrel.
  • Burnt Umber (941), ram rod, port fire.
  • Deep Cadmium Yellow (Winsor & Newton Finity), lace and piping.
  • Citadel Agrax Earthshade, overall wash.
  • Citadel Nuln Oil, wash gun barrel.

Finished and based

From the rear.

Next the Portuguese Telegraph Station.

Blues, whites and blacks done plus Telegraph equipment.

Another view.

Paints used, Vallejo unless stated otherwise:
  • Grey Surface Primer (601).
  • Dark Prussian Blue (899), engineering officer jacket, cockade.
  • Prussian Blue (965), telegraph troop jackets.
  • Vermillion (909), officer's sash, telegraph signal board.
  • Off White (820), trousers, officer's sword belt, plume tips.
  • Red (926), cockade.
  • White (951), jacket lace piping
  • Black (950), boots, headgear, sword grips, scabbards, lower 1/2 plumes, collars.
  • Basalt Grey (869), gaiters
  • Gunmetal Grey (863), trooper sword hilts, telegraph metal parts.
  • Medium Fleshtone (860), flesh.
  • Buff (976), trooper sword belts, officer gloves.
  • Brass (801), headgear trim, buttons, buckles, scabbard tips, officer sword hilt and telescope.
  • Silver (997), officer sash ends.
  • Light Brown (929), telegraph woodwork.
  • Yellow Ochre (913), telegraph rope.
  • Citadel Agrax Earthshade, overall wash.

Completed

So another two items completed for my Peninsular force, just need to invent a scenario to use them in.

Tony.


Wednesday, 2 January 2019

4th (Queen's Own) Regiment of Dragoons

Next up in the continuing Peninsular War project are the 4th (Queen's Own) Regiment of Dragoons. This regiment formed half of Brigadier General Henry Fane's heavy cavalry brigade at Talavera along with the 3rd Dragoon Guards Regiment. According to Oman they mustered around 545 personnel on the day.

For this unit I chose Front Rank miniatures as they have fore and aft bicorns, which is how I believe they would have been worn on campaign. Warlord plastic figures are totally wrong for the early part of the Peninsular War as the torsos are wearing post 1812 jackets, even if you do stick the bicorn or watering cap head on them. If I lived in North America I would probably have gone for the Brigade Games miniatures. Eagle Figures do an early war dragoon too but with the bicorn worn side to side.

After the very minimal amount of clean up required for Front Rank castings, a gentle bit of force was applied to a few heads and sword arms to get some more variation in pose.

Uniform distinctions were green/blue green facings with silver lace for the officers and white for the other ranks.

For more information on this unit see Jonathan Jones' blog post at  JJ's Wargames (seems silly to post the same info again)

First six mounted on rods and primed

I started by drilling a hole under each figure and mounted them onto some rod for painting. They were then brush primed with Vallejo Grey Primer.

Reds and facings done.

Once again I used Vallejo paints. The colours I used this time were:
  • Scarlet (817), officer's Jacket.
  • Vermillion (909), other ranks' jackets and all valises.
  • Dark Vermillion (947), cloaks.
  • Military Green (975), facings  , although I'm undecided if this is too dark and bugle cords.
  • White Grey (993), breeches.
  • Buff (976), officers gauntlets, haversacks and saddle bags.
  • Ivory (918), other rank's gauntlets.
  • Off White (820), sword belt, sword knot, carbine and cartridge box strap.
  • Black (950), cartridge box, bicorns, boots, small box on rear of valise.
  • Gunmetal (863), scabbards, sword hilts, carbine barrels, stirrups, buttons and some buckles.
  • Brass (801), chin scales, carbine butts, bugle and some buckles.
  • Oily Steel (865), sword blades.
  • Black Grey (862), carbine lock cover.
  • Leather Brown (871), canteen strap, saddle equipment securing straps.
  • Saddle Brown (940), saddle and stirrup straps.
  • Silver (997), officers lace.
  • White (951), other ranks lace (a drip or two of silver mixed in).
  • Flat Brown (984), carbine wood.
  • Flat Flesh (955), flesh.
  • Pastel Blue (901), canteen.
  • Red (926), officer's sash.

Just the washes to go.


Officer.
Sergeant.


 A wash of Citadel Agrax Earthshade and they were done.

The first thing I did with the horses was to trim the tails to give the nag-tailed look of British dragoon mounts. The horses were then spray primed with Army Painter Fur Brown (CP3016), left over from another project. They are then base coated using Coat d'Arms horse tones, in this case
  • Horse-tone Chestnut (223)
  • Horse-tone Bay (224)
  • Horse-tone Brown (235)
  • Horse-tone Grey (236)
As "all other regiments of heavy cavalry on the British establishment are to be mounted on nag-tailed horses of the colours of bay, brown, and chestnut." and the 4th fall into this category.

Manes, tails, sometimes noses and fetlock areas are then painted in contrasting colours using an image I found online as a reference. I use Off White (820) for the white markings. I paint hooves using a mix of Black Grey (862) and any flesh colour to give the grey a little warmth in tone.

Horse colour guide

All tack was painted thus
  • Leather Brown (871), leather straps
  • Gunmetal (863), bit
  • Brass (801), buckles
All horses then received a wash of Citadel Agrax Earthshade, except the grey which got a wash of Citadel Nuln Oil, while the tack is washed in Citadel Agrax Earthshade too.

The riders were then removed from their painting sticks and superglued to their mounts after first scraping the contact points of paint to get a better surface for glue adhesion.

The first six completed on their bases. Basing material to be added after the second six join them.

First six completed.

Once again just after completing these six I read that Horseguards had issued an order several years previously to stop buglers being mounted on greys, oops!

"The custom of mounting trumpeters on grey horses is to be discontinued, and they are in future to be mounted on horses of the colour or colours prescribed for the regiments to which they belong.

Harvey Calvert,
Adjutant-General.
Horse Guards
10th August, 1799."

not repainting it now. The horses eyes I paint in after varnishing, using Glossy Black (861).

The whole unit awaits basing materials.

The second six were then done in the same manor and based ready for the texturing to be done. At this point I realised I had attached the second batch to their group bases before painting the buckles and bits on the horses tack, Doh! Then to make it worse I realised I'd done the tack on the first six horses in Saddle Brown not Leather Brown. Having decided I preferred the Leather Brown look, more repainting was required.

All this and basing was completed an hour before the end of 2018, result.

Post basing and touch ups and corrections.

With their casualty counter

And that was that, finished. Well I did paint in the horses eyes after varnishing as previously mentioned. Next a Perry RHA 6pdr and the Perry Portuguese telegraph station

Tony.