Showing posts with label AWI. Show all posts

Thursday, 20 August 2020

AWI Game at NBHW

So my second Friday back at the club, now with added face masks, saw a 28mm AWI game with a scenario cobbled together from a few sources.

The rebellious american forces had located a Hessian encampment and decided to attack with the element of surprise afforded by the foggy conditions with the aim to do as much damage as possible before reinforcements from a nearby British encampment could be brought to bear.

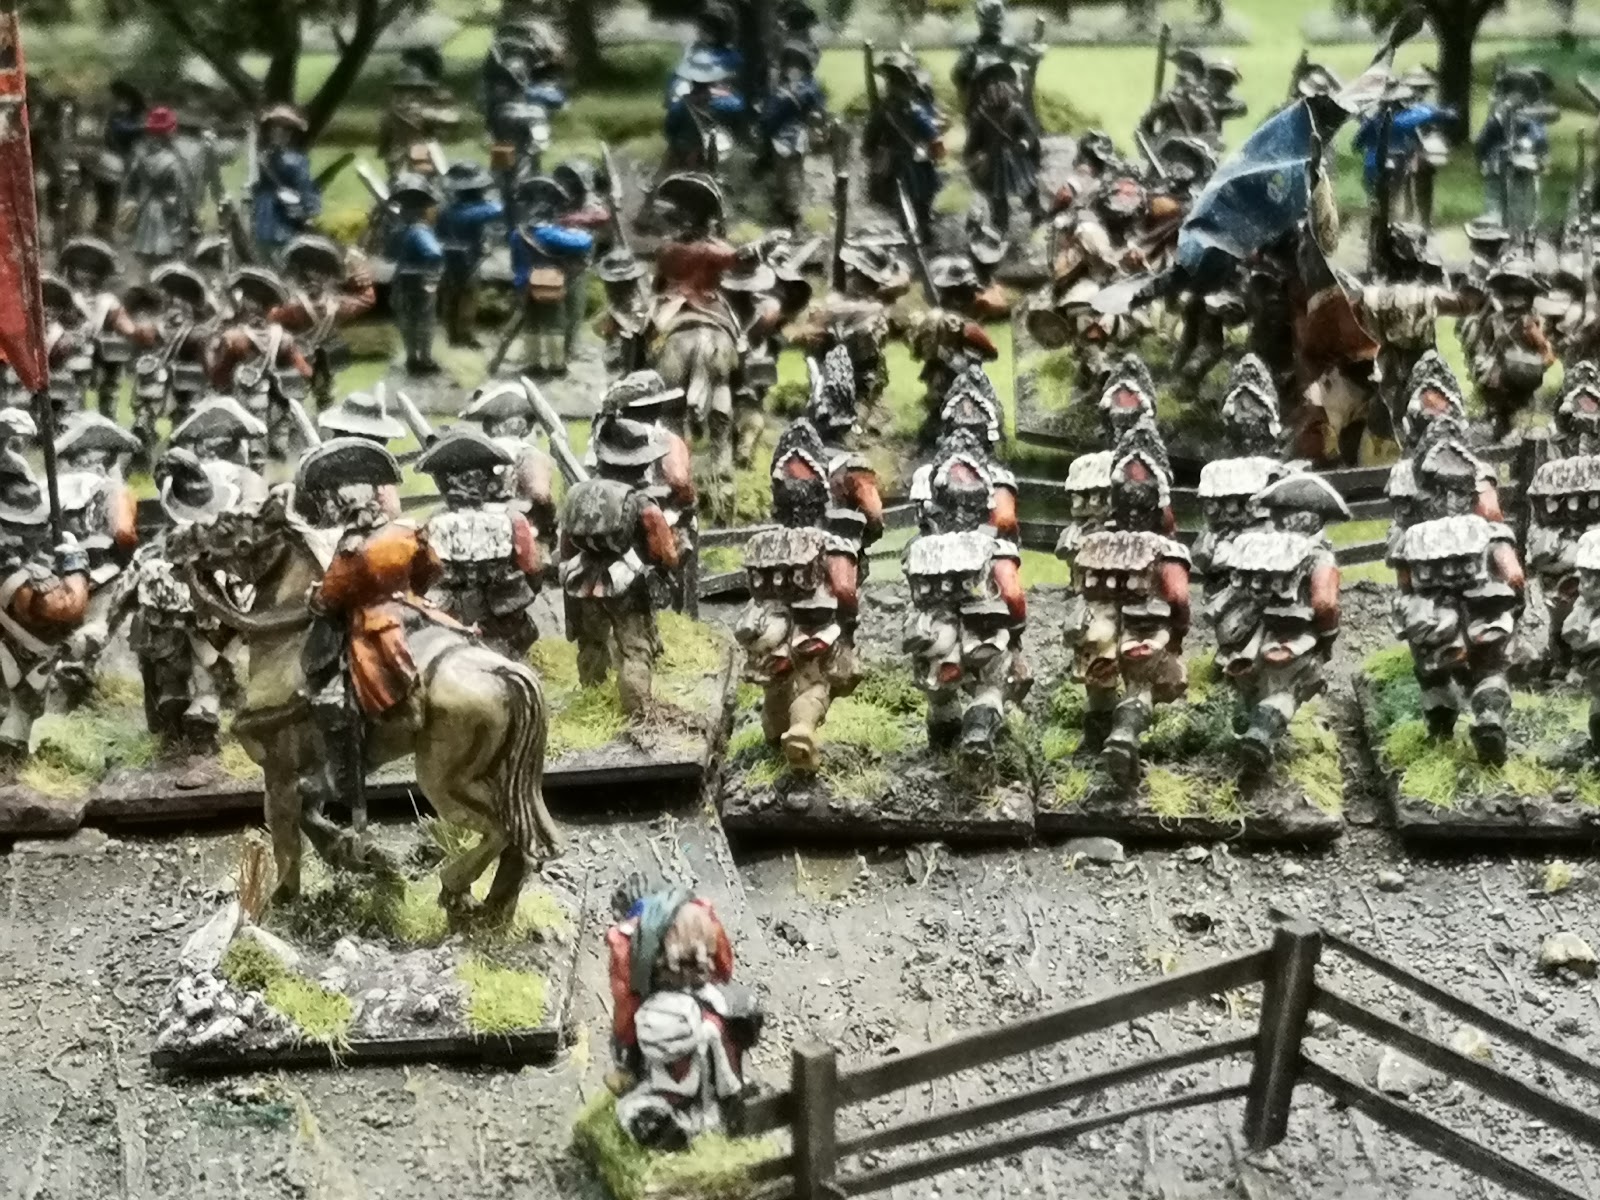
Looking through the Hessian encampment towards the crossroads. 

The officers returning to camp after a night in the local "establishment".

A Hessian jaeger picket at the crossroads would detect the advancing Americans on a successful dice roll and fire off a warning shot to alert the camp, failing that a shot would be fired as they were overrun.
Once alerted the German battalions could start to form up within the tent lines, taking two turns to go from disorganised to unformed to formed. The jaegers to the right of the road started from unformed due to their elite status. My artillery started and remained unlimbered and would not be visible to the Americans until they got closer.

My picket seemed to be suffering from an excess of sauerkraut and the rebels got in two turns of movement before they were spotted and a warning shot was fired to alert the camp.
My large line battalions roused from their tents and hastily fell in towards the edge of the camp nearest the village. The jaeger, being of higher quality, started to form a skirmish screen to the right of the camp. Unseen by the Americans my artillery started to manhandle their guns into position.
A messenger was also dispatched to the British camp in case the warning shots had been muffled by the fog.
Taking advantage of their surprise appearance the colonials rapidly advanced to the edge of the camp, deploying their artillery at the crossroads, and started to poor fire into the reforming Hessian units, the centre unit of fusiliers suffering particularly from these guns.
My jaegers' accurate rifle fire soon started to take a toll on the approaching opposing rifles as did my artillery when in opened up on this flank.
Once fully formed my line battalions began trading musketry with the enemy and it was at this point that the British reinforcements began to arrive to my rear.

Musketry fire through the camp as the British start to arrive.

The american artillery was beginning to inflict serious casualties on my fusilier battalion, but they shook this off passing all morale tests. The jaeger were coming under increased pressure from greater number of assailants and so refused their left flank for a more defensible position, however together with the artillery they did force the opposing rifles to retreat.
With British troops now streaming up the roads to their rear the German line battalions decided enough was enough and so marched off, bayonets glistening in the weak early morning sunshine, towards the enemy to their front, trampling tents before them as they went.

More British arrive as the jaegers pull back to a more defensive position.

View from the mule train.

They advanced in splendid formation, preparing to charge the upstart militia and colonials. However at this point I goofed. Overestimating the distances I only charged in one battalion, believing in error that the other was out of range, a fatal mistake as it turned out.

Hessians advance through the tent lines.

Charge!

In with the bayonet.

Now came the time for the dice gods to desert me. A large battalion of trained German regulars vs militia and colonials should have been relatively easy but fighting disordered due to moving through the tents and some very poor dice rolls from me as opposed to the exceedingly good rolls from my opponent saw my battalion falling back in rout. As my other battalion was not in melee, due to my distance estimating error, they had to take a morale test for a friendly unit routing, and yes, promptly failed it too. The jaegers seeing this also rolled and got a retreat result, so not as bad.

View from the rebel artillery.

Last ditch action.

With the Hessians either in rout or retreat and the British beginning to form up in strength, the Americans decided their work was done and prepared to withdraw. As time was also getting on the game was called at this point as a win for the upstart colonials.

Another great AWI game at the club, just need to sort out better dice next time!

Tony.

Friday, 29 November 2019

'Indian Run' 1777. Game at NBHW.


On Friday night at New Buckenham we had an AWI game. It was a fictitious scenario that saw Washington attempted to deny General Howe's advance guard from crossing the Indian Run river as the Crown forces pushed on toward the capture of Philadelphia. We used our club rules for AWI ,which I will eventually get round to digitising.

I took command of General Grant's brigade which consisted of the 9th, 21st, 38th and 24th foot on the British left flank facing the rebel battalions of General Sullivan across a shallow stretch of river.
To my right were three battalions of Hessians under General von Knyphausen who were making for a plank bridge over the river. Unbeknown to the revolutionaries General Cornwallis was making a flank march to the far right with the Black Watch, a light infantry battalion and a combined grenadier battalion.

My command and supporting 12 lbs artillery face the river.

Lead Hessian battalion crosses the plank bridge with light artillery support

View from the american rear.

My command advanced across the ford towards the waiting rebellious colonials while the lead Hessian unit was met by a head on charge, by a unit from General Lee's command, determined to stop the Germans from gaining a foothold on the other side of the bridge.

"At the double, Advance!"


After a vicious scrap at the bridge the lead Hessian battalion managed to fight their way through the Pennsylvanians and establish a bridgehead before being assailed on three sides. Included in this assault was the lead element of Washington's reinforcements, a battalion of marines. This attempt to throw the Germans back got off to a slow start thanks to support from my 12 lb artillery who had now switched their focus to supporting the isolated Hessians.

Lead Hessian battalion in a spot of bother.

This delay allowed the Hessians to dress their ranks and get further battailons across the bridge in support, before continuing their attack.

Hessian support arrives.

Hessians attack again.

It was around this time that Cornwallis' brigade arrived on Washington's flank, forcing him to turn his remaining reserves to face this threat and so relieving some of the pressure on the Germans.

Back to my command. After finally fording the river under musket and light artillery fire my lead battalions were given the order to level the bayonets and charge!

Time to get stuck in.....or not.

Unfortunately both units declined to obey and it was only the direct intervention of General Grant that finally saw the fusiliers charge home against the regulars of the 1st Maryland battalion. The 9th however could not get to grips with the stubborn 2nd Maryland battalion and a close quarter musketry duel commenced.

The 1st Maryland broke before the determined charge of the fusiliers who followed up after the routing colonials. This left room for the 24th foot to charge into Sullivan's militia battalion, with the expected result.

24th foot charge home.

At this point the game was called. On my flank two of the three continental battalions had routed, despite inflicting heavy casualties on my troops, 177 in total. In the centre the Hessians were now firmly across the bridge and pressing on with Cornwallis soon to make contact on the right.
It was deemed that Washington would rapidly withdraw his remaining forces after a hard fought action.

The Hessian bridgehead just before games end.

British left flank.

Centre and right flank at games end.

Another great game, many thanks to the two members whose figures were used.

As usual lots more photos and AAR in the clubs Facebook Album.

Tony.

Update:

Order of Battle

Crown Forces:

Left wing:   Grant's Brigade -  9th, 21st, 24th and 38th Foot. Two 12lb cannons.
Centre:        Von-Knyphausen's Brigade - von-Rall Grenadier Battalion, von-Lossberg fusilier                                  Battalion and von-Knyphausen musketeer Battalion. One 6lb cannon.
Right wing: Cornwallis' Brigade - composite light and Grenadier battalions and 42nd Foot. Two 6lb                        cannons.

Rebel Forces:

Right wing: Sullivan's Brigade - 1st and 2nd Maryland battalions and a militia battalion. One 6lb                            cannon.
Left wing:   Lee's Brigade - one each Virginian and Pennsylvania continental battalions and two                              Pennsylvania militia battalions. One 6lb cannon
Reserve:     Washington's Brigade -  Marine Battalion and one other Pennsylvania continental                                  battalion. Two 6lb cannons.


Tuesday, 26 March 2019

Guilford Courthouse 1781. Game at NBHW

A couple of weeks ago on Friday 15th and Saturday 16th March we refought the Battle of Guilford Courthouse during the American War of Independence, 238 years on from the actual date.
The figures were 28mm and the rules, our club's regular set of AWI rules that came from somewhere the distant past.

For those who don't know the battle the Continentals under Greene are deployed in three lines with militia forming the majority of the forward two lines and his core continental army units forming the third. The first two lines are sited at the edge and within woodlands while the third await on the crest of a hill. His plan, to delay the British and inflict as many casualties as possible without sacrificing his best trained troops.
The British, under Cornwallis, were aiming to push on and destroy Greene's forces after successes at earlier encounters.

From Wikipedia

View from the British rear.

The long view, first line engaged.
Continental regulars in the distance

I was given command of the British artillery and Tarleton's loyalist dragoons. The artillery rolled up the road supporting the advancing infantry and occasionally engaging in a bit of counter battery fire.
Tarleton's dragoons were ordered to support the left as Washington's dragoons had been seen loitering behind the american rifles on that flank.

I'm sure the militia should have run away by now, oh look the rifles have.

That's better, off they go. Keep after them!

Combined Guards battalion in support.

By end of play on the Friday night the American right flank was in disarray with only one small unit of continental regulars still in action against Hessian Jagers. The rest of the forward line had routed and taken one unit from the second line with it. On the British right the Americans were proving more stubborn, even those who routed when their colleagues on the other flank did were soon rallied.
This flank would prove troublesome throughout the whole battle.

The battle resumed the next day with the British continuing to press along the whole front. It wasn't long before I managed to destroy both of the american guns in their forward lines, for the lose of one of my three. My artillery then continued along the road through the woods assisting with the infantry advances to both sides.

Tarleton meanwhile found Washingtons dragoons in the open to his front and eventually both sides managed to charge, there was a general reluctance from the cavalry of both sides throughout.

Charge! eventually


Victory for Tarleton although he was unhorsed during the action.

After some tough fighting the second line of Americans on the British left were forced out of the woods when a few units turned and rallied under the watchful eyes of their regular troops on the hill, others continued to flee from the field.

On the British right things were still slow going with Lee's legion putting up a stubborn resistance, their dragoons even managing to get into the British rear to then threaten the supporting Guards battalion. The guards being the guards merely about faced their rear rank occasionally to let off a volley to deter these horsemen.

Americans forced out of the woods on the British left.
Americans attempt to form a rally line.

View from behind the Continental regulars

Rumour has it this was the militia commander from Friday night.

Tarleton, now re-horsed managed another charge, seeing off the opposing horsemen once and for all whilst receiving "a mere flesh wound" for his troubles. At this point a unit of Americans surrendered and were marched off into captivity.

Prison hulk for you lads.

With the British now finally shaking themselves out into order again, after the confusion of the fighting in the woods, and contemplating the final assault up the hill we ran out of time.

Final positions. Lee's dragoons sandwiched in the trees between the Guards and Jagers

So pretty much like in the historical encounter the battlefield would belong to the British as Greene withdraws his precious Continental regulars but also like the real battle the British paid a heavy price for their "victory"

Another great two session game. For a more balanced AAR and a load more photographs see the clubs Facebook album here.

Tony.


Tuesday, 19 June 2018

White Plains - Chatterton Hill 1776. Game at NBHW

On Friday night I took part in a American War of Independence game at New Buckenham. The game was played using an in house set of rules and was based on the action around Chatterton Hill in 1776, part of the Battle of White Plains. For information on the battle see Revolutionary War US article.

The initial set up saw Continental regulars and militia defending walled field enclosures across the top of the hill with some rifles forward towards the Bronx river. The initial units of British had just crossed this river at a fortuitously discovered ford and were advancing towards the hill.

Initial set up, Bronx River on the left , Chatterton Hill down the centre.
I will concentrate on my command in this report, for more details on how the whole game played out and a shed load more photographs see the club's Facebook Album

My British command having just crossed the Bronx River.

My command consisted of the leading elements of General Leslie's 2nd Brigade, the 28th and 35th Regiments of Foot together with two 12lbs of the Royal Artillery. I immediately advanced the infantry towards Chatterton Hill with the 35th on the right drifting slightly further right to open up the arcs of fire for the artillery. The Continental rifle men to my front closed up and stood laughing as once again, becoming a bit of a habit when playing these rules, my infantry refused to charge. I blame the artillery fire from the continental 6lbers on the hill.

The rest of the 2nd Brigade arrived and deployed, with the 5th forward, 49th supporting, to my left and started advancing towards the centre of the hill.

5th and 49th advance on my left while General Leslie gives the 28th a bit of a talking to.

The Continentals chose this moment to abandon their defences atop the hill and advance down towards the British, good news for the Royal Artillery who started inflicting casualties as they came.
The 5th and 49th inexplicably stopped their own advance and traded musketry with the 19th Continentals whilst also now becoming the target of the 6lbers.

My 35th advanced to the right to engage the rebel left flank while the 28th dressed to the right of the 49th. The 35th soon found themselves engaged by over five hundred muskets of the 1st New York and Delaware regiments.

The 19th Continentals now charged the softened up 5th Foot who routed and fled back across the Bronx River. The jubilant rebels careered on into the steady lines of the 49th, who under General Leslie's personal command saw them off  before they were hit by artillery fire into their flank as they retired from distant Hessian guns, routing them.
The 3rd New York that had charged down the Hill with the 19th ran into my advancing 28th Foot and were routed in turn, with the 28th continuing their advance behind.
The 35th however decided to give ground and pulled back to enable the Royal Artillery to deal with the 1st New York and Delaware regiments who also started to pull back to their original positions.

Events to the left of the British flank plus the time resulted in the game being called at this point.
In the overall battle the Continentals suffered 243 casualties to the British and Hessian 237. More tellingly the Continental right flank had collapsed, so with the impending loss of Chatterton Hill it was called a British and Hessian victory.

Once again another great, close game with these rules played with some superb figures from other club member's collections.

Tony.