Wednesday 26 September 2018

Lutterberg 1759. Game at NBHW

Friday saw a fictitious Seven Years War action played out using Osprey's Honours of War rules. The scenario was based on a "what if" hypothesis, in this case what if Duke Ferdinand had pressed the retreating French rearguard after the Battle of Minden.

The field of battle. Lutterberg centre left, allies on this side French on the right.

I had command of a the Hanoverian contingent consisting of brigade of four infantry battalions, a battery of medium artillery and a brigade of two cavalry regiments. I also had control of an independent unit of Jagers and regiment of Hussars. These formed up on the allied left with the hussars out of sight in the woods.

My command with cavalry still to arrive.

The British would arrive through the village of Lutterberg in the centre and on the right flank were deployed the Brunswick and Hessian contingent.
Unknown to the allies was the condition of the ground to the front of the British and Hanoverian forces. This turned out to be patchy marshy ground that caused problems with movement for those crossing.

French right flank facing my Hanoverians and centre right facing the British

French left flank, as seen, facing the Brunswick and Hessian units, and centre left.

The fiercest fighting developed on the Allied right, where the Brunswick and Hessian contingent fought the French left flank for control of a strongly defended hamlet. A flanking attack was met by concealed French infantry and cavalry who appeared from the nearby woods. A Brunswick battalion broke before the French horse but the latter were then scattered by the fire of a Grenadier battalion. French losses mounted as did those of the Brunswick and Hessian's. By the time the French rearguard was ordered to retire the Allies had finally got a foothold in the hamlet and the supporting french units on this wing were broken but the Germans had paid a high price for this limited success.

The concealed French advance out of the woods.

First assault goes in.

The grenadiers arrive in support.

The British in the centre were a bit tardy in their advance from Lutterberg and by the time the forward units found themselves mired down in the boggy ground in front of the French centre they were a bit isolated. This lead battalion soon came under sustained artillery fire with the inevitable result and together with its supporting battalion the survivors recoiled back up the slope to the safety of the late arriving battalions and cavalry. From here the British horse and foot watched as their artillery batteries dragged their pieces through the bog and engaged the French centre, which contented itself with retiring just enough to stay out of effective range.

The British left column arrive.

Over on my flank I eventually got my battalions into position to start firing upon the French occupying the hamlet to my front with my units of cavalry to their rear as support.

Hanoverian cavalry arrive in support.

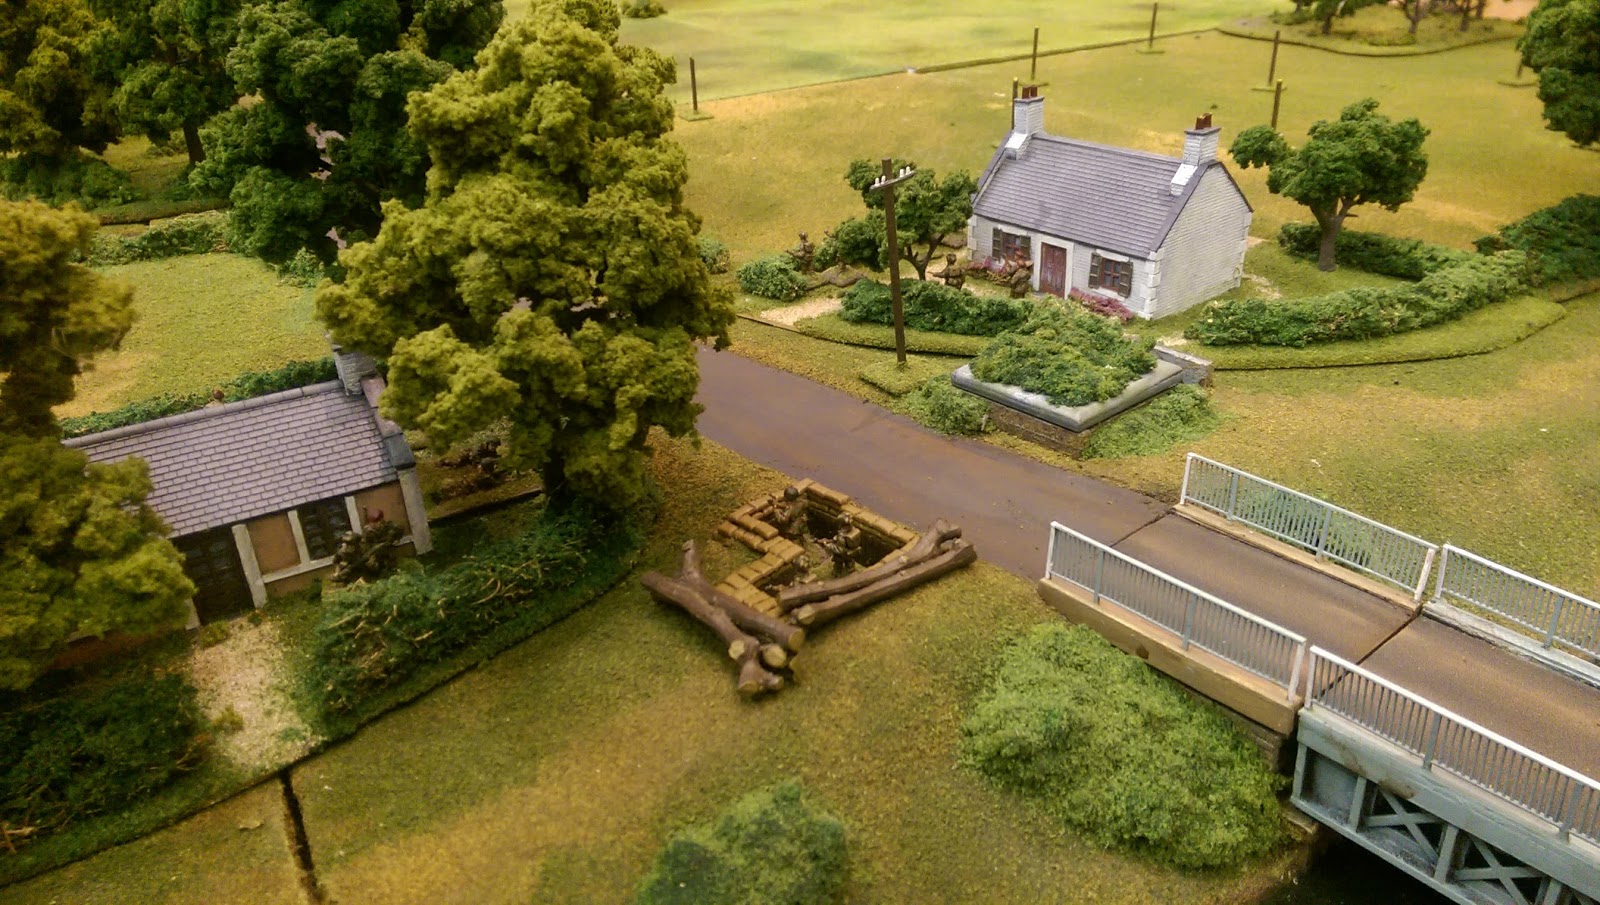
Hanoverians about to cross the stream, British under heavy fire in the centre.

Fearing the arrival of French cavalry, there were some off the table, I moved the hussars out of the wood up to my left flank by the stream and proceeded to cross with my infantry. At this point the French grenadier battalions holding this flank advanced out of the hamlet to engage my forces. A fierce firefight and melee ensued and my lead battalion fell back over the stream.

French grenadiers and Hanoverian infantry engaged.

At this point the French cavalry did arrive behind the hamlet to my front but only, as it transpired, to deliver the orders for the rearguard to withdraw.

The game was called at this point as a French victory as the rearguard would have be enable to withdraw largely intact, only their left flank having taken any substantial casualties, whilst inflicting significant casualties on the pursuing allies.

This game maybe proves why, historically, Duke Ferdinand chose not to engage when the French rearguard turned and formed up.

Another great game where once again I claim no responsibility for any of the superb miniatures on display.

For even more photos and info see the club Facebook album Lutterberg 1759

Tony.

28mm Napoleonic British engineers.

After seeing James Roach's AAR for a game he titled The Bridge at Hermoso Santo I decided that this looked like a fun scenario to put on at the club.

This would however require an engineers cart and some British engineers. Fortunately The Other Partizan show was due so I purchased a MDF / Resin engineers cart from Warbases along with one of their Heavy Draft Horses.

For the figures it was into the bits boxes. The engineering officer I made using a Perry metal officer from the BH 106 Colonels in bicornes ( Worldwide 1808-13) set with the lace on the jacket front removed. I should have removed the gorget as well but forgot.


As for the others, technically Royal Military Artificers until 1812 when they became the Royal Sappers and Miners, I used two left over Victrix artillerymen and two Victrix centre company figures, all with the shoulder tufts removed. These were painted to match the figures in Plate D of the Osprey book MAA 204 Wellington's Specialist Troops.


Apparently most of the field engineering work was carried out by the Royal Staff Corps troops as the
Royal Military Artificers were in short supply and being controlled by the Board of Ordnance rather than Horse Guards the usual inter department coordination problems no doubt arose.

Still need to base the cart but overall I'm happy how these came out and I'm looking forward to the game.

Tuesday 25 September 2018

15/18mm American Civil War: Update 7, Another infantry brigade and fences.

So a quick update this time. The Union infantry won over the British napoleonic heavy dragoons in the next to get painted competition.

Again these are Blue Moon miniatures and this time there are eight bases, so in Brigade Fire & Fury either 1200 or 1600 men.

A slight change to the colours used this time. For a bit of variety I used Vallejo 965 Prussian Blue for the jackets instead of my usual Dark Prussian Blue, and the blanket rolls were painted in a mix of Vallejo 875 Beige Brown and 990 Light Grey. The varnish, supposedly a satin, went a bit too glossy on these so they will get hit with a matt one once I buy some more.


Additionally I painted up six casualties from Old Glory 15s to act as disorder markers.


Another thing that slowed down the work on these was the manufacture of my first snake fencing. I used matchsticks based on tongue depressors. Slightly oversized for the figures, hence only three rails high. But I think they look OK for a first attempt.


Tony.

Monday 17 September 2018

Napoleonic Naval. Game at NBHW.

Friday's game at New Buckenham was a Napoleonic naval affair using Alan Abbey's rule set Blood, Bilge and Iron Balls.
The encounter was set up to mimic Trafalgar but on a much smaller scale, to act as a rules reminder and test game for the clubs full size Trafalgar to be played later this year. The ships are 1/1200 and a mix of Langton and Skytrex miniatures.

Initial positions.

The mixed Spanish/French fleet awaits at the top of the table whilst the Royal Navy approach in line, with the wind from the bottom. The wind was from the bottom right in this photo diagonally across the table.

Each side was split into three commands and I got the third and fourth ships in the British line. HMS Temeraire, a 98 gun second rate, and HMS Victory, a 104 gun first rate. No pressure then. The ships ahead were a 64 gun and 74 gun whiles the three behind were all 74 gun ships.

The French were at the head of their column with the Spanish behind.

The rule set is card driven with different phases of play drawn randomly, these being for each nation, Sailing, Repair and Firing. Hits are determined by D6 rolls based on range etc whilst the damage, recorded on a ship control board, is determined by a card draw from a normal playing card deck with each card relating to a set amount and type of damage in the rule book.

Example of a ship control board, things didn't go well for Victory.

As the British found out as they approached, only the front French division of three ships was under sail the rest of the french and Spanish were content to drift and fire broadsides at the Royal Navy.

HMS Temeraire, HMS Victory and HMS Conqueror 

The lead RN division of two ships peeled off to the right to engage the rearmost Spanish ships whilst I took the following two, 2nd and 1st rate ships, off to the left to counter the leading French ships that were actually underway and tacking to gain the wind, these included the 118 gun L'Orient.

The lead British ship catches fire after receiving a Spanish broadside. This was soon extinguished.

The leading French ships managed to manoeuvre just in time to give rise to a passing engagement with my two ships. An engagement in which the card gods were definitely french. Whilst HMS Temeraire escaped relatively unharmed, Victory suffered mightily from L'Orient with several intense fires breaking out, high casualties among her crew, a mast down and rudder damage.

HMS Victory well ablaze after some devastating broadsides from the 118 gun French ship L'Orient.

Victory still fighting on.

The confused melee.

Unable to manoeuvre whilst rudder repairs were underway L'Orient was able to sail into a position to stern rake Victory, thankfully from long range, which inflicted further, but limited, damage.

Royal Navy attempt a boarding action on a Spanish ship.

The lead RN ship decided to initiate boarding actions against one of the rearmost Spanish galleons while it's sister ship poured fire on her escorts, who were finally getting underway as were the centre French/Spanish ships.

A burning Peuple Souverain, after receiving two raking broadsides rams HMS Temeraire.

HMS Temeraire managed to cross the T of one of these ships and bow raked Peuple Souverain twice at close range. This started several fires as well as severely damaging her hull. Never-the-less the French ship determinedly sailed on and rammed it's tormentor but failed to grapple and bounced off where it was finished off by a broadside from Victory's remaining guns, the only ship actually sunk on the night.

The rear Royal Navy division joins the action in the centre.

More fires, this time the French on the receiving end.

By now the rearmost RN division was engaged in the centre and individual ship vs ship gunnery contests flared up. With the night drawing to a close two Spanish ships rammed and boarded Victory and Temeraire and despite some fierce resistance these weakened ship's crews were overcome and their ships colours struck. How much longer Victory would have stayed afloat before one of the raging fires finally found her magazines was anybodies guess. On the other flank a four way boarding and counter boarding melee ensued which resulted in the RN capturing a Spanish 3rd rate while the other thee ships drifted apart their remaining crews almost to exhausted and small to crew their charges.

The game was called here as a French/Spanish victory as they had captured one 1st rate ship and one 2nd rate ship for the loss of one French 3rd rate sunk and one Spanish 3rd rate captured. Another fun Age of Sail game that highlighted a few areas that would need looking at before the big game, mainly with regard to the need for extra sailing and arc of fire guides to speed these phases up with multiple players involved simultaneously.

Again I can claim no responsibility for these wonderful models, I just turned up and played.

For more photos etc see the club Facebook album Open Seas - Run up to Trafalgar


Tony.

Monday 10 September 2018

D-Day. Orne Bridges and Sword Beach. Game at NBHW.

Back over the August bank holiday weekend I played in our club's big D-Day game. The rules used were Rapid Fire and the miniatures 20mm (1/72, 1/76).

Apart from the plain flat terrain boards everything else is part of one member’s collection.

The game resulted in a German win this time, very poor morale dice by the British airborne troops allowed 21st Panzer to advance to support the rear of the beaches.

Here are a few pictures of the game I managed to take, with links at the end to loads more, plus a few videos.

First, set up and the first nights action.


I was unable to attend on the Saturday so the last pictures are from Sunday.


Now the links:


Other Videos D-Day

Tony.