Tuesday, 20 March 2018

ACW, 2nd Test of updated Brigade Fire & Fury. Game at NBHW

Last Friday at NBHW four of sat down for our second test game of the updated Brigade Fire & Fury. This time we were looking to confirm some of our assumptions on plunging fire from our first game as well as getting to grips with some melees.

So I rolled up another game using the Pick up Game chapter from the rules. This time only one Corps per side and I reduced the amount of artillery the dice rolls generated.

We decided to use the same size table, 3' x 4', but this time played across the narrow dimension. The features were added to give us some of the conditions we wished to test.

Woods and Swamp :- Rough Ground
Open Woods and River :- Broken Ground
Wheat Field :- Open Ground
Main Road :- Good Road
Farm Track :- Poor Road

Suggested Deployments

How that translated to the table.

The Union wait.

Knowing that we were wanting to get some melees in this time the Confederate players wasted no time with their advances. Several double quick moves soon saw the forward Union division in combat whilst both sides artillery got stuck in with either plunging fire on the advancing / defending brigades or counter battery fire.

Here they come boys!

Brigade with attached battery receive the Rebel charge.

The left hand Union brigade with attached battery didn't fair too well, both retreated behind the division on the hill. The right hand brigade did better, halting the charge with musket fire before counter charging and forcing the Confederate brigade to retreat broken.

The victorious rebels on the Union left flank then charged on towards the hill but halted short. This tempted to Union brigades to charge down the hill towards them. Unfortunately being over 4" away when they started and on a higher elevation than the target, they suffered passing fire from the Southern artillery on the opposite hill on their way in, added to the musketry of the defending brigades. This fight didn't go well for the boys in blue and red who were soon destroyed.

Not looking good for the zourves

It was about here that we ran out of time, although we had achieved our main aims of getting to grips with the melee phase as well as confirming some of the passing fire and other artillery fire rules.

End positions.

As a learning exercise it worked well. As a game it could benefit from a few changes, the biggest being some more ground behind the Union hill line so that units retreating didn't have to leave the table. The maps in my scenario download have been changed to reflect this.
The main things learnt were, standing in the open on a hill in range of opposing artillery is a lot more dangerous now than it was with the previous version of the rules and remember to include any passing fire you can when calculating defensive fire against a charge, it can make a big difference.
We are still debating whether to give defensive attributes to fence lines as historically troops did hunker down behind these for extra cover.

As mentioned the base labels and maps are available in my Scenario download section.

As usual more photos in the club's Facebook Album

Tony.


Tuesday, 13 March 2018

Peninsular War, 1811 ish. Outpost. Game at NBHW

Last Friday three of us at New Buckenham got together for a smallish Napoleonic game of Black Powder set during the Peninsular War. It was a fictitious scenario I had created.

An understrength Portuguese brigade found itself manning an old hill top fortification overlooking a river crossing. The rest of the allied line had pulled back from this river but the orders hadn't reached the Portuguese. When a strong French force arrives to their front they send an officer off to seek instructions/support.

Table layout and deployment areas, squares are 24"

A few scenario specific rules etc:
1) The River is only fordable by infantry and cavalry, artillery must use the bridge.
2) If more than a single move is used while crossing the river that unit ends up Disordered.
3) The slope of the hill is Rough Ground / Light Cover
4) Hill top fortification is Heavy Cover.
5) On the Portuguese first turn a mounted commander leaves the hill top heading west. He has to spend one full turn off the table before returning with a British relief force west of the river.

The French objective is to capture the hill fortification and destroy the Portuguese brigade.

The Anglo/Portuguese objective is to prevent the loss of the Portuguese brigade by either defeating the French or withdrawing the Portuguese over the river under British cover.

The opposing forces, British force unknown to French players. I also allocated the brigade commanders with individual attributes for Aggression, Decisiveness and Independence as per the main rule book.

French Roster (Infantry all normal special attributes)
Anglo Portuguese (Infantry all normal special attributes)

So how did it play? Well my first mistake was setting the table up 12" short on the north south axis giving a table of 6' x 5' instead of  6' x 6', so we decided to use 50% distances for the game. In hindsight even with the slightly smaller table we should have stuck with our usual 66%.
The Portuguese set up with the line regiments inside the fortifications and the caçadores in skirmish formation amongst the light cover of the rough ground on the forward slope of the hill. The French advanced rapidly on their left flank in columns with their centre more cautious in Ordre Mixte behind the artillery battery. The French cavalry hung back on the right flank near the bridge.

The French centre would soon deploy
into Ordre Mixte

By turn 4 the French left columns had reached the caçadores while the centre moved slowly forward behind their guns. At this point the British relief force arrived west of the river with the RHA half battery deploying at the bridge in perfect position to enfilade the French light cavalry!

British relief force arrives, doesn't look good for the French cavalry.

As predicted the nearest French cavalry unit was soon advancing to it's rear after some accurate fire by the British artillerists. Meanwhile the light dragoons and line infantry, thanks to the CinC, crossed the river and began to advance to their allies aid. The 5/60th rifles however seemed reluctant at this point to do much, words would be had with the brigade commander later!
The caçadores traded a few rounds of fire with the French columns then started falling back behind their line colleagues who had repositioned within the fortification to meet the immediate threat.

Deus nos preservará

The French centre and right turned to face the new threat to their flank and a sharp cavalry action was fought between a regiment of French hussars and British light dragoons.

Cavalry action

At this point the "save" dice god deserted me and the light dragoons withdrew leaving the victorious hussars to follow up and force them back over the river. This left them in perfect position to be enfiladed by the RHA who had now crossed the bridge.

British finally shake out into line.

The British infantry finally cleared the trees and shook out into line, even the rifles finally joined in and deployed in front of the other light dragoon regiment that had failed to charge the enemy horse artillery. The rifles together with a battalion of line soon put paid to this artillery leaving the stranded French hussars no option but to withdraw as their brigade had broken. This they did in good order despite receiving several shots from the RHA.

French assault arrives, caçadores now in support of the line.

Meanwhile back on the hill I had succumbed to the usual wargamer's error of forgetting the game's objectives, doubly embarrassing as I wrote them. Instead of withdrawing the Portuguese under cover of the supporting British, I held them at the walls to try and repel the assaulting French, which they did, for a couple of turns anyway, before the walls were breached and some poor command roles led to bad positioning and the breaking of the brigade with one unit forced from the table and another destroyed. Oops!

The game was called at this point as a French win with the Portuguese brigade broken and the hilltop in French possession.
A fun game with a few errors made on both sides, the unfamiliarity of using 50% distances caused some poor positioning, and a reminder of a vital factor in wargaming, namely "Remember the Bl@@dy Objectives!"

As usual a lot more photographs on the club Facebook Album

Unit rosters, map and any scenario specifics will be available in my scenarios section soon.

Tony.


Monday, 12 March 2018

15/18mm American Civil War: Update 3, Command Stands.

Next on the agenda were some command stands. Whilst the painted second hand troops I had acquired included some of these I wasn't perfectly happy with them and had some ideas of my own brewing.

Wasn't really happy with these command stands.

I had also acquired four AB generals in another purchase and wanted to use these superb sculpts as my Corps commanders and these were painted first.

AB Union Generals

After that the existing miniatures were removed from their bases and repainted to match my Union colour pallet, this included two of the turncoats mentioned in an earlier post switching back to blue.

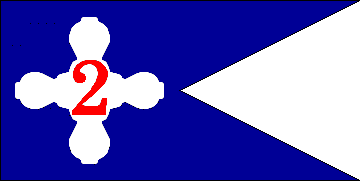
The Idea I had kicking around was to include Corps and Division identifying flags on the command bases. As I am doing Union forces there is quite a bit known about these flags as the design was "somewhat" formalised. Quick intros can be found here on Wikipedia and here at Archive of the Colors. The other part of my plan was to make these flags removable and interchangeable to enable me to represent any force I required. I had thought of including identifying Brigade flags as well on the unit command stands but decided this was a bit much (for now anyway). After a bit of thought I decided to go with fixed flag poles and removable flags.

Original 2 Corps HQ Flag
1st Division, 2 Corps


Two of the mounted figures I had looked like cavalry troopers with arms outstretched and sabres drawn. After removing the swords and repositioning the arms, holes were drilled in the hand to take a flagstaff. These two were painted as cavalry sergeants and allocated, one each, to the Corps command groups.
Two of the AB generals were picked to be Corps commanders, the other two I have put aside for now.
The other mounted officers, I have worked out they are Blue Moon figures, were split, one each, between the two Corps bases and three Division bases I was doing. The Division bases also received a foot colour sergeant, also by Blue Moon, with the spear point removed from his flagstaff to allow a change of flags.

The flags themselves were home made. Images were downloaded from the internet and opened in a graphics package, I use GIMP . After mirroring the image to give a reverse side, and correcting any text on this side, they were resized to suit and printed out. They were then fitted around surrogate flagstaffs and glued together with Pritt Stick making sure they didn't stick to the shafts. Shaping was done at this point. So there I had interchangeable flags.

All I had to do now was base them all up, and that was completed this weekend.

Completed Corps and Division command stands 

II Corps: Corps command and 1st - 3rd Division commanders

First outing will be this coming Friday.

Tony.

Edit: After further research I have gone for smaller Corps flags and downloaded them from Wargame Vault to get a better print resolution.

Size corrected Corps flag

Tuesday, 20 February 2018

ACW, Test of updated Brigade Fire & Fury. Game at NBHW

Last Friday night at New Buckenham four of us sat down for a game of Brigade Fire & Fury. This was the first time we had played the updated version so the idea was to see what had changed and get to grips with the update before introducing them into general club use.
I rolled up a two vs two game using the Pick up Game section in the back of the rule book for a mid war eastern theatre encounter. The results can be seen in the pictures of the base labels below.

Union Force Labels

Confederate Force Labels

As can be seen the random dice roll selection resulted in a lot of artillery and in hind site I should have reduced this somewhat. The union were allocated a cavalry division to act as forward pickets and to see how they were effected, if at all, by the update.

Next it was time to come up with a battlefield and scenario. This of course had to include my new rail road items so I came up with the following map. The union would be defending the station and river crossing with cavalry outposts in the two farms while the confederates would be tasked with capturing these. A 3 x 4 foot table was selected to try and get the forces engaged quickly for rules evaluation.

Table map [ 3' x 4' ]

The terrain features were classified as follows for movement:
River - Broken Ground for Infantry and Cavalry, Impassable for Artillery.
Wood - Rough Ground
Open Wood - Broken Ground
Orchard - Broken Ground
Wheat Field - Open Ground
Poor Road - Open Ground (even though on map it's drawn as Good Road)
Fences - As per the rules no effect (we may house rule here)

I also allocated suggested deployment positions for the Union forces. As it happens, on the night we decided to deploy one corps on each side of the road rather than one behind the other.

Table with suggested troop deployment

So how did the game play?
Well a lot of book reading occurred in places, mainly related to artillery plunging fire and line of sight effects of various terrain. The change in formation into line and supported line caused some discussion as this seemed different to what we had played before, but we couldn't remember if the difference was due to a house rule or not. The amended firing phase was picked up quite quickly even with the greater range of weapon types now catered for and it didn't take long to realise, that yes, firing has been made a lot more effective. The changes in the arcs of fire was also seen as an improvement with players having to take more care with positioning to bring fire to bear. If you didn't know the arcs have reduced from 45 to 30 degs for infantry and from 30 to 15 degs for artillery.

Union troops line the riverbank.

Union guard the station, dismounted cavalry having fallen back.

Rebel yell, straight over the bridge.

Union await the charging rebel column.

Unfortunately with all the discussion between moves, and because the Union cavalry pulled back before contact, we didn't get any melee combat this game. We did find artillery fire seemed more effective under these rules and when we got close enough so was musketry. We got the attack by the confederates over the bridge wrong this time but know what to correct next time, which will be in a few weeks time when we intend to get to grips with a few more aspects of the update.

First impressions of Brigade Fire & Fury are very good with, it was felt, several improvements over the original .

After a bit of tweaking to OOBs and map I will make these available in my Scenarios download section.
UPDATE, now available as ACW Defend the Station.

UPDATE 2, have added some Power Point resources that I use to do the maps to my Download section.


As usual more pictures at the club's Facebook Gallery

Tony.


Sunday, 18 February 2018

15/18mm American Civil War: Update 2, First buildings


Having decided on a scale to use for railway track, see previous update here, I now wanted some buildings to go with it. So it was back to Peter Pig's website and it's Range 21 Scenery for a look. In their American Western, AWI and ACW range, at items 29 and 30 were a 15mm Western/ACW Water tower and Station. These were duly ordered and another club member picked them up from the Vapnartak show in York.

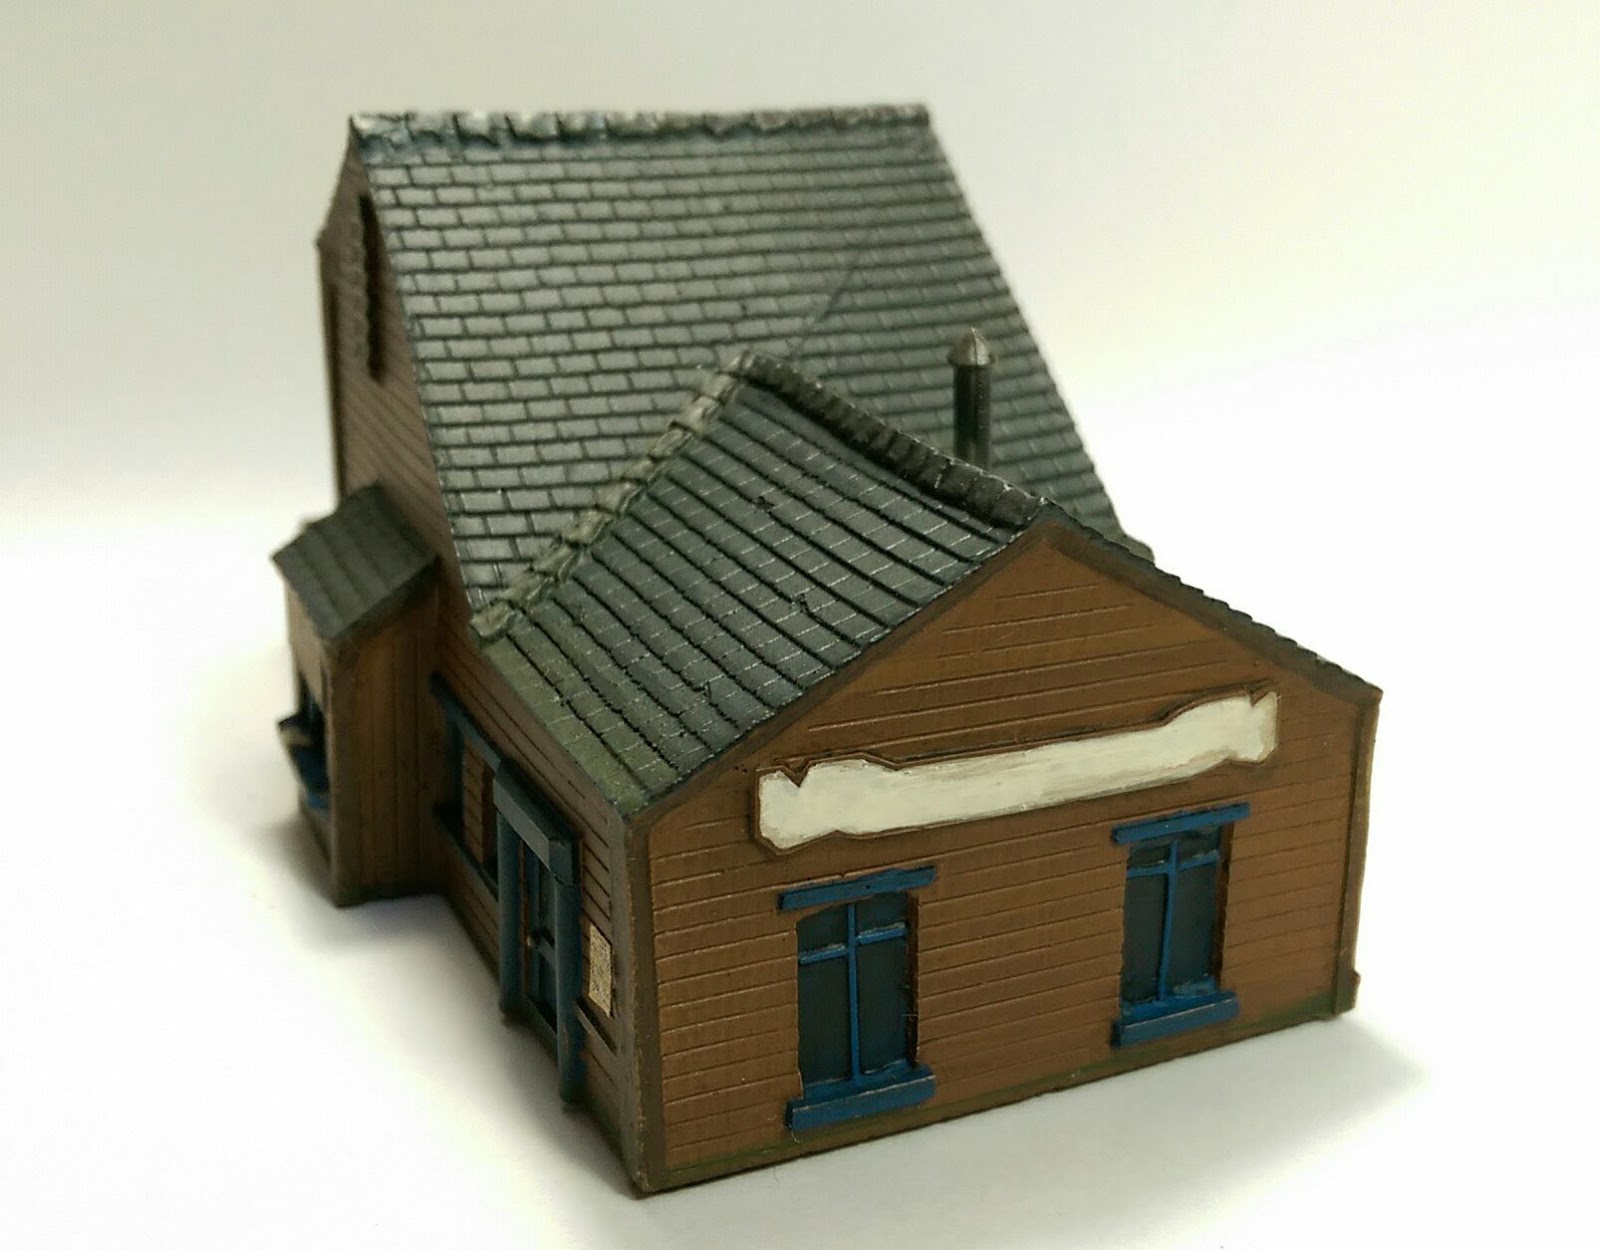
These were my first resin buildings, but with advice from the club terrain guys and plenty of YouTube watching, I pretty much knew the pitfalls. So after a soapy wash and dry they were assembled and primed with Vallejo grey surface primer, including the underside of the station.

Assembled and Primed.

As I intend these to be used for ACW games and was thinking of Northern Virginia I spent some time looking for info on the roofing material used, slate tiles or wood shingles? I settled on slate tiles for the station, the water tower was obviously wooden shingles.

Just awaiting finishing touches.

So the station roof was base coated Basalt Grey for the tiles and Gunmetal Grey for the lead flashing. This was then washed with GW Drakenhof Nightshade to give a bluish tinge then again with GW Nuln Oil. A thinned Cam Olive Green was applied in places to represent moss staining.
The main wooden areas on both were base coated with Beige Brown with the beams and shutters of the station picked out in Leather Brown. Some lightened planks were added for contrast. These areas were all washed with GW Agrax Earthshade.
The window and door frames were painted Prussian Blue as I wanted some colour and the Virginian state flag is blue. The window panes themselves were also painted this colour then received three washes of Drakenhof Nightshade and one of Nuln Oil. The windows got two coats of satin varnish after the whole building was matt varnished. Apart from a few sign boards that was it for the station.

Completed station.

Completed station.

Completed station.

The water tower after getting the same base coat as the station was again washed with Agrax Earthshade while the roof shingles were dry brushed with two lighter browns. The spout and bands were painted with Black Grey and then washed with Nuln Oil before the bands were dry brushed with a mixture of Gunmetal Grey and Red Leather to try nand imply rust. If was then based on a spare Renedra 2" square plastic base for stability.

Completed Water Tower


So that was them finished and I think they came out OK. Plus they made it onto the gaming table a day later.

In the thick of it.

Tony