So a quick update this time. The Union infantry won over the British napoleonic heavy dragoons in the next to get painted competition.
Again these are Blue Moon miniatures and this time there are eight bases, so in Brigade Fire & Fury either 1200 or 1600 men.
A slight change to the colours used this time. For a bit of variety I used Vallejo 965 Prussian Blue for the jackets instead of my usual Dark Prussian Blue, and the blanket rolls were painted in a mix of Vallejo 875 Beige Brown and 990 Light Grey. The varnish, supposedly a satin, went a bit too glossy on these so they will get hit with a matt one once I buy some more.
Additionally I painted up six casualties from Old Glory 15s to act as disorder markers.
Another thing that slowed down the work on these was the manufacture of my first snake fencing. I used matchsticks based on tongue depressors. Slightly oversized for the figures, hence only three rails high. But I think they look OK for a first attempt.
Tony.
Labels
- NBHW
- Napoleonic
- British Napoleonic
- Black Powder
- French Napoleonic
- Shako II
- ACW
- Portuguese Napoleonic
- Tips
- Fire & Fury
- Talavera
- SYW
- Spanish Napoleonic
- AWI
- Russian Napoleonic
- Carnage & Glory
- Hobby
- Post of Honour
- Prussian Napoleonic
- Zulu Wars
- Medieval
- War of Austrian Succession
- Bolt Action
- D&D
- KoW Vanguard
- Korea
- RPG
- Terrain
- Tricorn
- WWII
- War of Spanish Succession
- Wings of Glory
Tuesday, 25 September 2018
Monday, 17 September 2018
Napoleonic Naval. Game at NBHW.
The encounter was set up to mimic Trafalgar but on a much smaller scale, to act as a rules reminder and test game for the clubs full size Trafalgar to be played later this year. The ships are 1/1200 and a mix of Langton and Skytrex miniatures.
![]() |
Initial positions. |
The mixed Spanish/French fleet awaits at the top of the table whilst the Royal Navy approach in line, with the wind from the bottom. The wind was from the bottom right in this photo diagonally across the table.
Each side was split into three commands and I got the third and fourth ships in the British line. HMS Temeraire, a 98 gun second rate, and HMS Victory, a 104 gun first rate. No pressure then. The ships ahead were a 64 gun and 74 gun whiles the three behind were all 74 gun ships.
The French were at the head of their column with the Spanish behind.
The rule set is card driven with different phases of play drawn randomly, these being for each nation, Sailing, Repair and Firing. Hits are determined by D6 rolls based on range etc whilst the damage, recorded on a ship control board, is determined by a card draw from a normal playing card deck with each card relating to a set amount and type of damage in the rule book.
![]() |
Example of a ship control board, things didn't go well for Victory. |
As the British found out as they approached, only the front French division of three ships was under sail the rest of the french and Spanish were content to drift and fire broadsides at the Royal Navy.
![]() |
HMS Temeraire, HMS Victory and HMS Conqueror |
The lead RN division of two ships peeled off to the right to engage the rearmost Spanish ships whilst I took the following two, 2nd and 1st rate ships, off to the left to counter the leading French ships that were actually underway and tacking to gain the wind, these included the 118 gun L'Orient.
![]() |
The lead British ship catches fire after receiving a Spanish broadside. This was soon extinguished. |
The leading French ships managed to manoeuvre just in time to give rise to a passing engagement with my two ships. An engagement in which the card gods were definitely french. Whilst HMS Temeraire escaped relatively unharmed, Victory suffered mightily from L'Orient with several intense fires breaking out, high casualties among her crew, a mast down and rudder damage.
![]() |
HMS Victory well ablaze after some devastating broadsides from the 118 gun French ship L'Orient. |
![]() |
Victory still fighting on. |
![]() |
The confused melee. |
Unable to manoeuvre whilst rudder repairs were underway L'Orient was able to sail into a position to stern rake Victory, thankfully from long range, which inflicted further, but limited, damage.
![]() |
Royal Navy attempt a boarding action on a Spanish ship. |
The lead RN ship decided to initiate boarding actions against one of the rearmost Spanish galleons while it's sister ship poured fire on her escorts, who were finally getting underway as were the centre French/Spanish ships.
![]() |
A burning Peuple Souverain, after receiving two raking broadsides rams HMS Temeraire. |
HMS Temeraire managed to cross the T of one of these ships and bow raked Peuple Souverain twice at close range. This started several fires as well as severely damaging her hull. Never-the-less the French ship determinedly sailed on and rammed it's tormentor but failed to grapple and bounced off where it was finished off by a broadside from Victory's remaining guns, the only ship actually sunk on the night.
![]() |
The rear Royal Navy division joins the action in the centre. |
![]() |
More fires, this time the French on the receiving end. |
By now the rearmost RN division was engaged in the centre and individual ship vs ship gunnery contests flared up. With the night drawing to a close two Spanish ships rammed and boarded Victory and Temeraire and despite some fierce resistance these weakened ship's crews were overcome and their ships colours struck. How much longer Victory would have stayed afloat before one of the raging fires finally found her magazines was anybodies guess. On the other flank a four way boarding and counter boarding melee ensued which resulted in the RN capturing a Spanish 3rd rate while the other thee ships drifted apart their remaining crews almost to exhausted and small to crew their charges.
The game was called here as a French/Spanish victory as they had captured one 1st rate ship and one 2nd rate ship for the loss of one French 3rd rate sunk and one Spanish 3rd rate captured. Another fun Age of Sail game that highlighted a few areas that would need looking at before the big game, mainly with regard to the need for extra sailing and arc of fire guides to speed these phases up with multiple players involved simultaneously.
Again I can claim no responsibility for these wonderful models, I just turned up and played.
Monday, 10 September 2018
D-Day. Orne Bridges and Sword Beach. Game at NBHW.
Back over the August bank holiday weekend I played in our club's big D-Day game. The rules used were Rapid Fire and the miniatures 20mm (1/72, 1/76).
Apart from the plain flat terrain boards everything else is part of one member’s collection.
The game resulted in a German win this time, very poor morale dice by the British airborne troops allowed 21st Panzer to advance to support the rear of the beaches.
Here are a few pictures of the game I managed to take, with links at the end to loads more, plus a few videos.
First, set up and the first nights action.
I was unable to attend on the Saturday so the last pictures are from Sunday.
Now the links:
Album D-Day first photos
Album SWORD - 6th June 1944
Other Videos D-Day
Tony.
Monday, 20 August 2018
Napoleonics. Game at NBHW.
![]() |
The battlefield |
Once again I played the British with one other player while three players took control of the French. The British had two brigades of infantry, one of light dragoons and one of heavy cavalry including household troops. The French had five brigades, a grenadier brigade with guard, dragoon brigade inc foot dragoons, infantry brigade, mixed cavalry brigade and guard cavalry brigade.
![]() |
Location and Turn of Brigade arrivals. |
A bit of a slow arrival for the British saw the French almost get the positional advantage near the bridge although we did manage to get a tiny unit of rifles into one half of the central objective.
![]() |
About turn three |
The arrival of both sides heavy cavalry saw some sharp engagements with initial success going to my household units before they started to come under french artillery fire and my recent poor run of save and break test rolls reared it's ugly head again.
![]() |
British heavies arrive |
![]() |
The heavies get stuck in |
In the end both sides heavy brigades ended up broken which left the French guard cavalry brigade and it's lancers free rein on this side of the table.
The final British infantry brigade to arrive also did so slowly but use of the "Follow me" command allowed us to get a light battalion into the other half of the objective.
The French grenadier battalions made short work of the British lines to their front, eventually, and together with the arrival of their dragoon brigade in the British flank soon saw this brigade break. This was despite a line battalion surviving three rounds of melee, alone in line, against supported charging French dragoons before withdrawing. This left the Grenadiers free to turn their attention to the objective. Initially they were forced into square by the British light dragoons and two battalions were destroyed by artillery and rocket! fire before they shook out and assaulted the tiny unit of rifles who found themselves evicted from the town into the path of some Red lancers.
![]() |
The objective under assault from both sides. |
At this point the game was called, the British had two broken brigades with a third, the light dragoons, hanging on by the skin of it's teeth. The other infantry brigade was intact but it's light battalion was now cut off in the town.
The French had one cavalry brigade broken and the grenadier brigade was close as well but that still left them three intact brigades.
So overall another French win.
A fun game with the random entry points giving some tactical problems, especially for the British.
Friday, 10 August 2018
Vimeiro 1808. Game at NBHW.
Last Friday at New Buckenham seven players plus an umpire got together for a refight of the Battle of Vimeiro in 1808. This time 15mm was to be the scale and Black Powder at 50% distances the rules.
The table was laid out as per the picture below.
The British started with Hill's brigade on the ridge at top right, south of Vimeiro itself. Anstruther And Fane's brigades on the hill in front of Vimeiro. Acland on the end of the centre ridge and the cavalry in the centre in reserve. Ferguson, Bowes and Nightingall's brigades were hidden behind the ridge between Acland and the buildings of Ventosa on the northern end of the ridgeline. These three brigades would remain hidden unless they moved or the French crested the ridge. The buildings of Toledo can be seen left of centre.
Trant's Portuguese and Craufurds brigades were due to arrive at some point during the game.
The French start with the brigades of Charlot, Thomieres and Kellermann facing Vimeiro with the cavalry division of Marraron in support. The brigades of Brenier and Solignac out of sight on a flanking march to the northern, near end of the table.
As usual I played on the British side and as the experienced Black Powder player of the three commanders I was given the role of Wellesley as well as command of Anstruther and Fane's brigades.
The rest of the AAR will be from my / Wellesley's point of view.
The first thing we did was to garrison Vimeiro with two battalions from Hill's brigade leaving one battalion and his combined lights to hold the south western ridge and allied right flank.
The brigades hidden behind the ridge were to remain stationary until the French flanking manoeuvre was visible and then occupy Ventosa and defend the ridge line.
After a couple of grazing shots from french artillery the line battalions of Anstruther's brigade pulled back to the reverse slope leaving the lights and artillery to contest the approaching French columns.
Unfortunately unlike historically the French were well coordinated and soon pushed hard against the British centre.
After a few refusals the french cavalry finally charged Anstruther's right battalions forcing them into square.
Whilst the centre columns shock out into line.
At this point the first of the French flank attacks, Brenier's, arrived on the road right next to Ventosa, fortunately their command roll was poor allowing the leading unit of Ferguson's hidden brigade to occupy it first. This occupying force, a small unit of combined light companies, immediately came under accurate French artillery fire and soon broke, this started the almost separate battle for the northern ridge line.
Solignac's flanking force then arrived on the road through Toledo and some rapid moves saw them throw their weight into the ridge battle. The 20th Light Dragoons, saw a chance and charged a unit of French dragoons narrowly losing the subsequent mele and fleeing the battle after another poor break test roll, seemed to be contagious amongst the allied commanders.
The first square collapsed and was destroyed as expected while the second survived a couple of rounds of mele against two French columns before grudgingly withdrawing. Some good dice for the allies finally.
UPDATE: Have added a scenario map plus army rosters and a few notes to the Scenario download section. Link in right side bar.
The table was laid out as per the picture below.
![]() |
Battlefield |
The British started with Hill's brigade on the ridge at top right, south of Vimeiro itself. Anstruther And Fane's brigades on the hill in front of Vimeiro. Acland on the end of the centre ridge and the cavalry in the centre in reserve. Ferguson, Bowes and Nightingall's brigades were hidden behind the ridge between Acland and the buildings of Ventosa on the northern end of the ridgeline. These three brigades would remain hidden unless they moved or the French crested the ridge. The buildings of Toledo can be seen left of centre.
Trant's Portuguese and Craufurds brigades were due to arrive at some point during the game.
The French start with the brigades of Charlot, Thomieres and Kellermann facing Vimeiro with the cavalry division of Marraron in support. The brigades of Brenier and Solignac out of sight on a flanking march to the northern, near end of the table.
As usual I played on the British side and as the experienced Black Powder player of the three commanders I was given the role of Wellesley as well as command of Anstruther and Fane's brigades.
![]() |
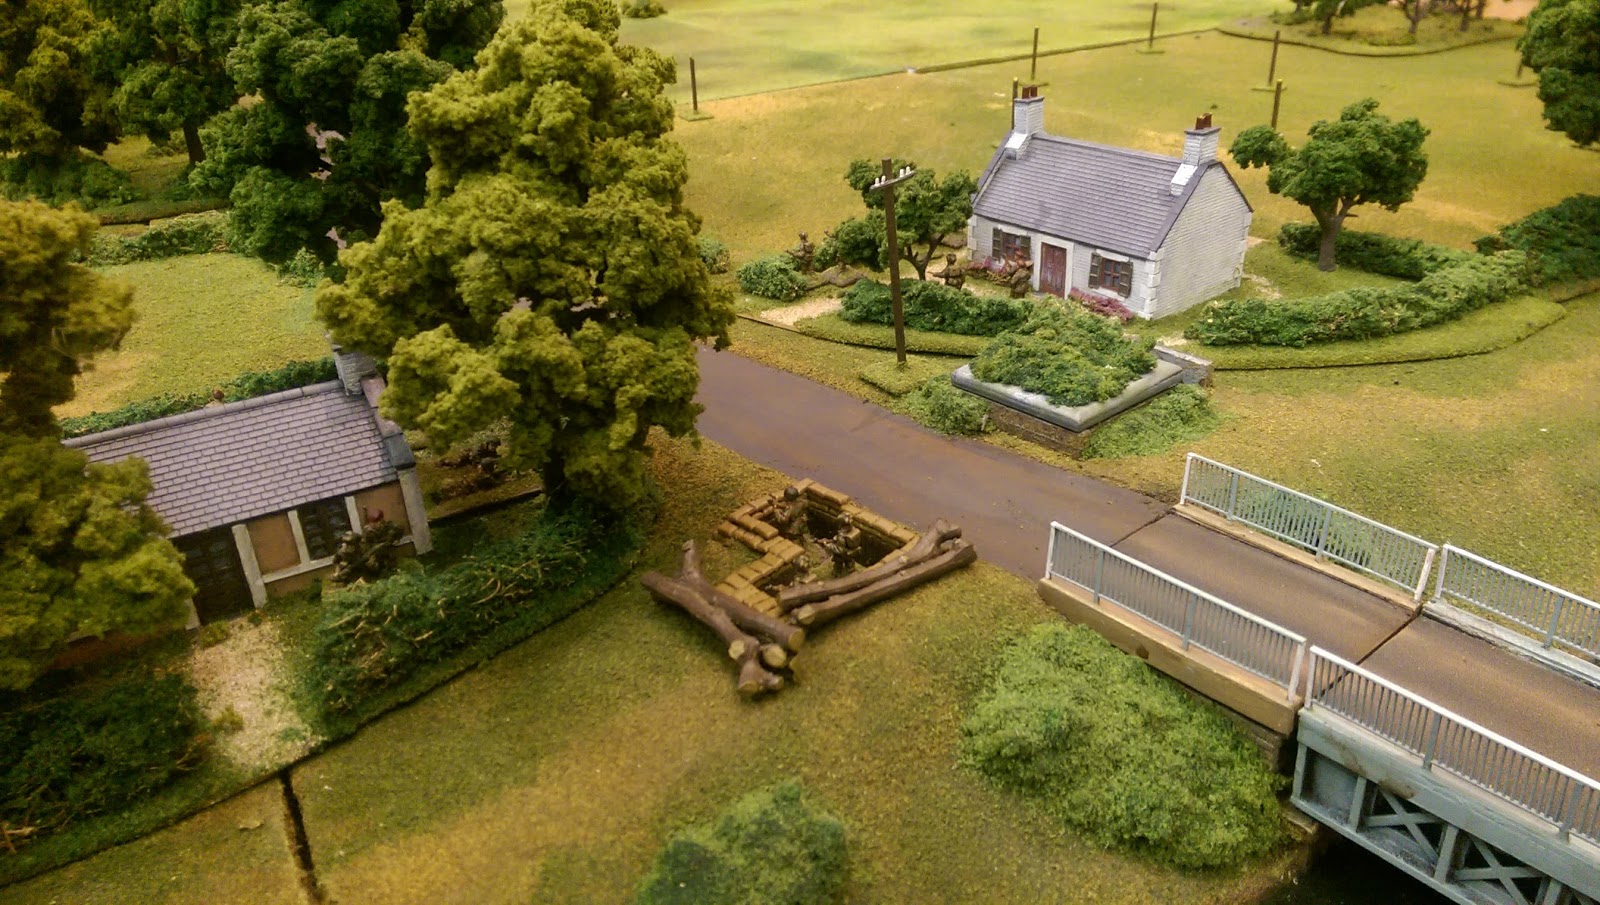
The south of the field with Vimeiro centre. There was a bridge in front of Wellesley by game start. |
The rest of the AAR will be from my / Wellesley's point of view.
The first thing we did was to garrison Vimeiro with two battalions from Hill's brigade leaving one battalion and his combined lights to hold the south western ridge and allied right flank.
The brigades hidden behind the ridge were to remain stationary until the French flanking manoeuvre was visible and then occupy Ventosa and defend the ridge line.
After a couple of grazing shots from french artillery the line battalions of Anstruther's brigade pulled back to the reverse slope leaving the lights and artillery to contest the approaching French columns.
Unfortunately unlike historically the French were well coordinated and soon pushed hard against the British centre.
![]() |
The French centre advances. |
After a few refusals the french cavalry finally charged Anstruther's right battalions forcing them into square.
![]() |
French cavalry finally charge. |
Whilst the centre columns shock out into line.
A theme was beginning to emerge at this point in the game, whilst I was rolling wonderful attack dice my opponents were throwing equally good saving rolls, whereas my saving, and break test throws were terrible.
![]() |
View from Vimeiro |
At this point the first of the French flank attacks, Brenier's, arrived on the road right next to Ventosa, fortunately their command roll was poor allowing the leading unit of Ferguson's hidden brigade to occupy it first. This occupying force, a small unit of combined light companies, immediately came under accurate French artillery fire and soon broke, this started the almost separate battle for the northern ridge line.
![]() |
Action around Ventosa, light dragoons about to charge. |
Solignac's flanking force then arrived on the road through Toledo and some rapid moves saw them throw their weight into the ridge battle. The 20th Light Dragoons, saw a chance and charged a unit of French dragoons narrowly losing the subsequent mele and fleeing the battle after another poor break test roll, seemed to be contagious amongst the allied commanders.
Some good news for the allies was the arrival of Craufurd's brigade on the hights overlooking Ventosa, but this was tempered by poor command rolls that saw them hardly move the rest of the game.
Things in the centre were deteriorating badly for me by this point.
Continued pressure and continued good save rolls from the French players, whilst mine were still terrible, saw first Fane's brigade and then Anstruther's break. Fane's remaining units fell back under continued French pressure. Whilst Anstruther's battalion in square was allowed to stand it's ground the other remaining battalion had to withdraw. A quick reshuffle of Hill's garrison in Vimeiro opened up a space for this battalion to move into a defensible position allowing it to stop withdrawing whilst Hill's battalion together with Nightingall's brigade attempted to manouver to plug the centre.
![]() |
Not looking good for Wellesley |
Continued pressure and continued good save rolls from the French players, whilst mine were still terrible, saw first Fane's brigade and then Anstruther's break. Fane's remaining units fell back under continued French pressure. Whilst Anstruther's battalion in square was allowed to stand it's ground the other remaining battalion had to withdraw. A quick reshuffle of Hill's garrison in Vimeiro opened up a space for this battalion to move into a defensible position allowing it to stop withdrawing whilst Hill's battalion together with Nightingall's brigade attempted to manouver to plug the centre.
Over on the left, French cavalry forced several battalions into square only to then pull back allowing their infantry columns to advance and charge home against the British squares.
![]() |
Column vs Square? |
The first square collapsed and was destroyed as expected while the second survived a couple of rounds of mele against two French columns before grudgingly withdrawing. Some good dice for the allies finally.
With the french cavalry from the centre now threatening Hill's right flank battalions, the centre a mess and the left needing to reform the game was called. It was decided Wellesley would have had no option but to stage a fighting retreat back to Porto Novo and the Royal Navy, ending British involvement in the Peninsular, oops.
Another great game at the club, and nice to see the 15mm naps out again. Shame about the result but that's the way the dice roll.
A load more photographs as usual in the club's Facebook Album
UPDATE: Have added a scenario map plus army rosters and a few notes to the Scenario download section. Link in right side bar.
Tony.
Subscribe to:
Posts (Atom)